Lab Protocols 
Shantel A. Martinez | Update 2019.07.17
TABLE OF CONTENTS:
Germination Assay
Measuring Dry Weight
Autoclaving
Lyophilizer/FreezeDrier
pH Meter
Hormone Extraction
LCMS Sequence Setup
LCMS Run Protocol
LCMS Data Analysis
LCMS Peak Calling
DNA Extraction
RNA Extraction
KASP Assay
KASP LightCycler View
Germination Assay 
Seed Sterilization
Step 1. Count out number of seeds (dry) and place the seeds in 50ml conical tubes
a. One line per tube, 3 reps of 10 = 30 seeds per treatment
b. Treatments may include 2uM ABA, 5uM ABA, 5mM MES (No Hormone), or 10uM GA
Step2. Add sterilization solution 5-10ml above dry seed line (not rocket science). Tightly screw lid.
Step3. Shake to mix every 5 min for 15 min.
Step4. Use the vacuum with a tip to suck out the solution (It’s hard to get out all solution, but try to get as much as you can)
Step5. Add autoclaved dH2O 5-10ml above seed line (to dilute and wash out the sterilization solution)
Step6. Shake every few minutes for 7min
Step7. Vacuum off dH2O and repeat steps 5 & 6 twice (a total of 3 rinses)
Step8. Use the vacuum to suck off autoclaved dH2O
Plating seeds
Step1. Use sterile petri plates and sterile filter paper; insert one blue filter paper into each plate
Step2. Label the top of each plate according to solution concentration, type of seed being plated, weeks after-ripened, and date plated
Step3. Make hormone/treatment solutions and add 6ml into each plate
6 mL per plate | Calculate 6.25 mL x Number of Plates
Step4. Use small forceps to remove bubbles underneath filter paper (make sure the filter paper is flat on the bottom, may need to fold on the sides to fit)
Step5. Use small forceps to place each sterile seed onto the plate (embryo facing left, seed fold facing down)
Step6. Plate 3 sets of 10 onto one plate
Step7. Parafilm the top and bottom of the plate together in order to keep the moisture in
Step8. Wrap 3-4 plates together in foil to exclude light. (shiny side in; dull side out)
Germination Screen
Step1. Once plated, place in the 20-22°C incubator
Step2. Score every 24 hours for 5 days after plated and incubated
Step3. Day 1: mark on top of plate / for germinated seeds and X for 3-point seeds
a. Record both germinated seeds and 3-point seeds for each day
Step4. Day2: record newly developed germinated and 3-point seeds
Step5. Continue process on Day3, Day4, and Day5
Germination Index
(5 x gday1 + 4 x gday2… + 1 x gday5)/(5 x n)
Where gday1 is the number of seed that germinated on day 1
gday2 is the number of seeds that ADDITIONALLY germinated on day 2 and so on
n is the total number of seeds plated
Sterilization Solution: 10% Bleach + 0.01% SDS + ddH2O
| Total Vol. | 200mL | 400mL | 800mL | |
|---|---|---|---|---|
| Bleach | 20mL | 40mL | 80mL | (61.54mL if 1.3x) |
| 2% (20%) SDS | 1mL (100uL) | 2mL (200uL) | 4mL (400uL) | |
| ddH2O | 179mL | 358mL | 716mL |
Measuring Dry Weight for Hormone Extraction 
Step 1: Label each tube with an idenifing number.
My labeling system is just the numbers in the 1000's, and all of he tube information is found in a google worksheet.
For the hormone extaction protocol, 5 mL polypropylene round-bottomed tubes (Falcon, product: 352063) is needed for downstream speed vac rotor size.
EXAMPLE DATASHEET SET-UP

Step 2: Place tube holder (Below Image A) on the small balance.
Step 3: Close the balance door. Wait 20 seconds for the tube holder to steady. Tare the tube holder.
From this point on, always be patient. The precise weight is more important than the time it takes to tare, wait, weigh, wait, etc.
Step 4: Add the empty tube plus cap into the designated tube holding position. Close the balance door. Wait until the balance read stops on one value for 15+ seconds.
Changing where a tube is measured from tube to tube will result in inconsistent values, increasing the measuring error. So keep the position of the tube exactly the same for each tube, and preferably in the exact middle of the balance.
Step 5: Record the empty weight value into the datasheet column "weight_empty". Record all 4 digits past zero. Repeat steps 3-5 for each tube.
The sample masses are key to determining the final concentration, so use the most sensitive scale that you have and record all 4 digits past the decimal. (Ex. 7.0035g - 6.0125g = 0.091g) This information is used in the final data analysis to determine ng/g dry weight of the hormone in your samples.
Step 6: Prep samples per experimental conditions
Step 7: Flash freeze samples in liquid N
Step 8: Grind in liquid N. Make sure tissue is well ground. Place in -80C for a minimum 2 hours.
For dry seed tissue, add a few drops of water into the liquid N with the seeds before grinding to help break up the tissue.
Step 9: Separate the lids and cover the tubes with parafilm that have poked holes from a tack.
Step 10: Lyophilize ground sample for 48hrs (Below Image B).
Step 11: Replace tube lids with original lids (Below Image C). Keep track of which lid goes with which tube since each lid has a slightly different mass
Step 12: Weigh the tube with lid now containing the lyophilized sample as in Steps 3-5 above. Record the sample weight value into the datasheet column "weight_sample". With the "weight_sample" minus the "weight_empty", we can get the actual mass of the lyophilized sample (column “dry_weight”).
Step 13: Parafilm the tubes tightly to prevent any sample from escaping and to prevent moisture entering during shipping.
Step 14: Store and ship the tubes wrapped in aluminum foil to prevent any hormone breakdown due to light. You can store and ship these samples at room temperature.
| A | B | C |
|---|---|---|
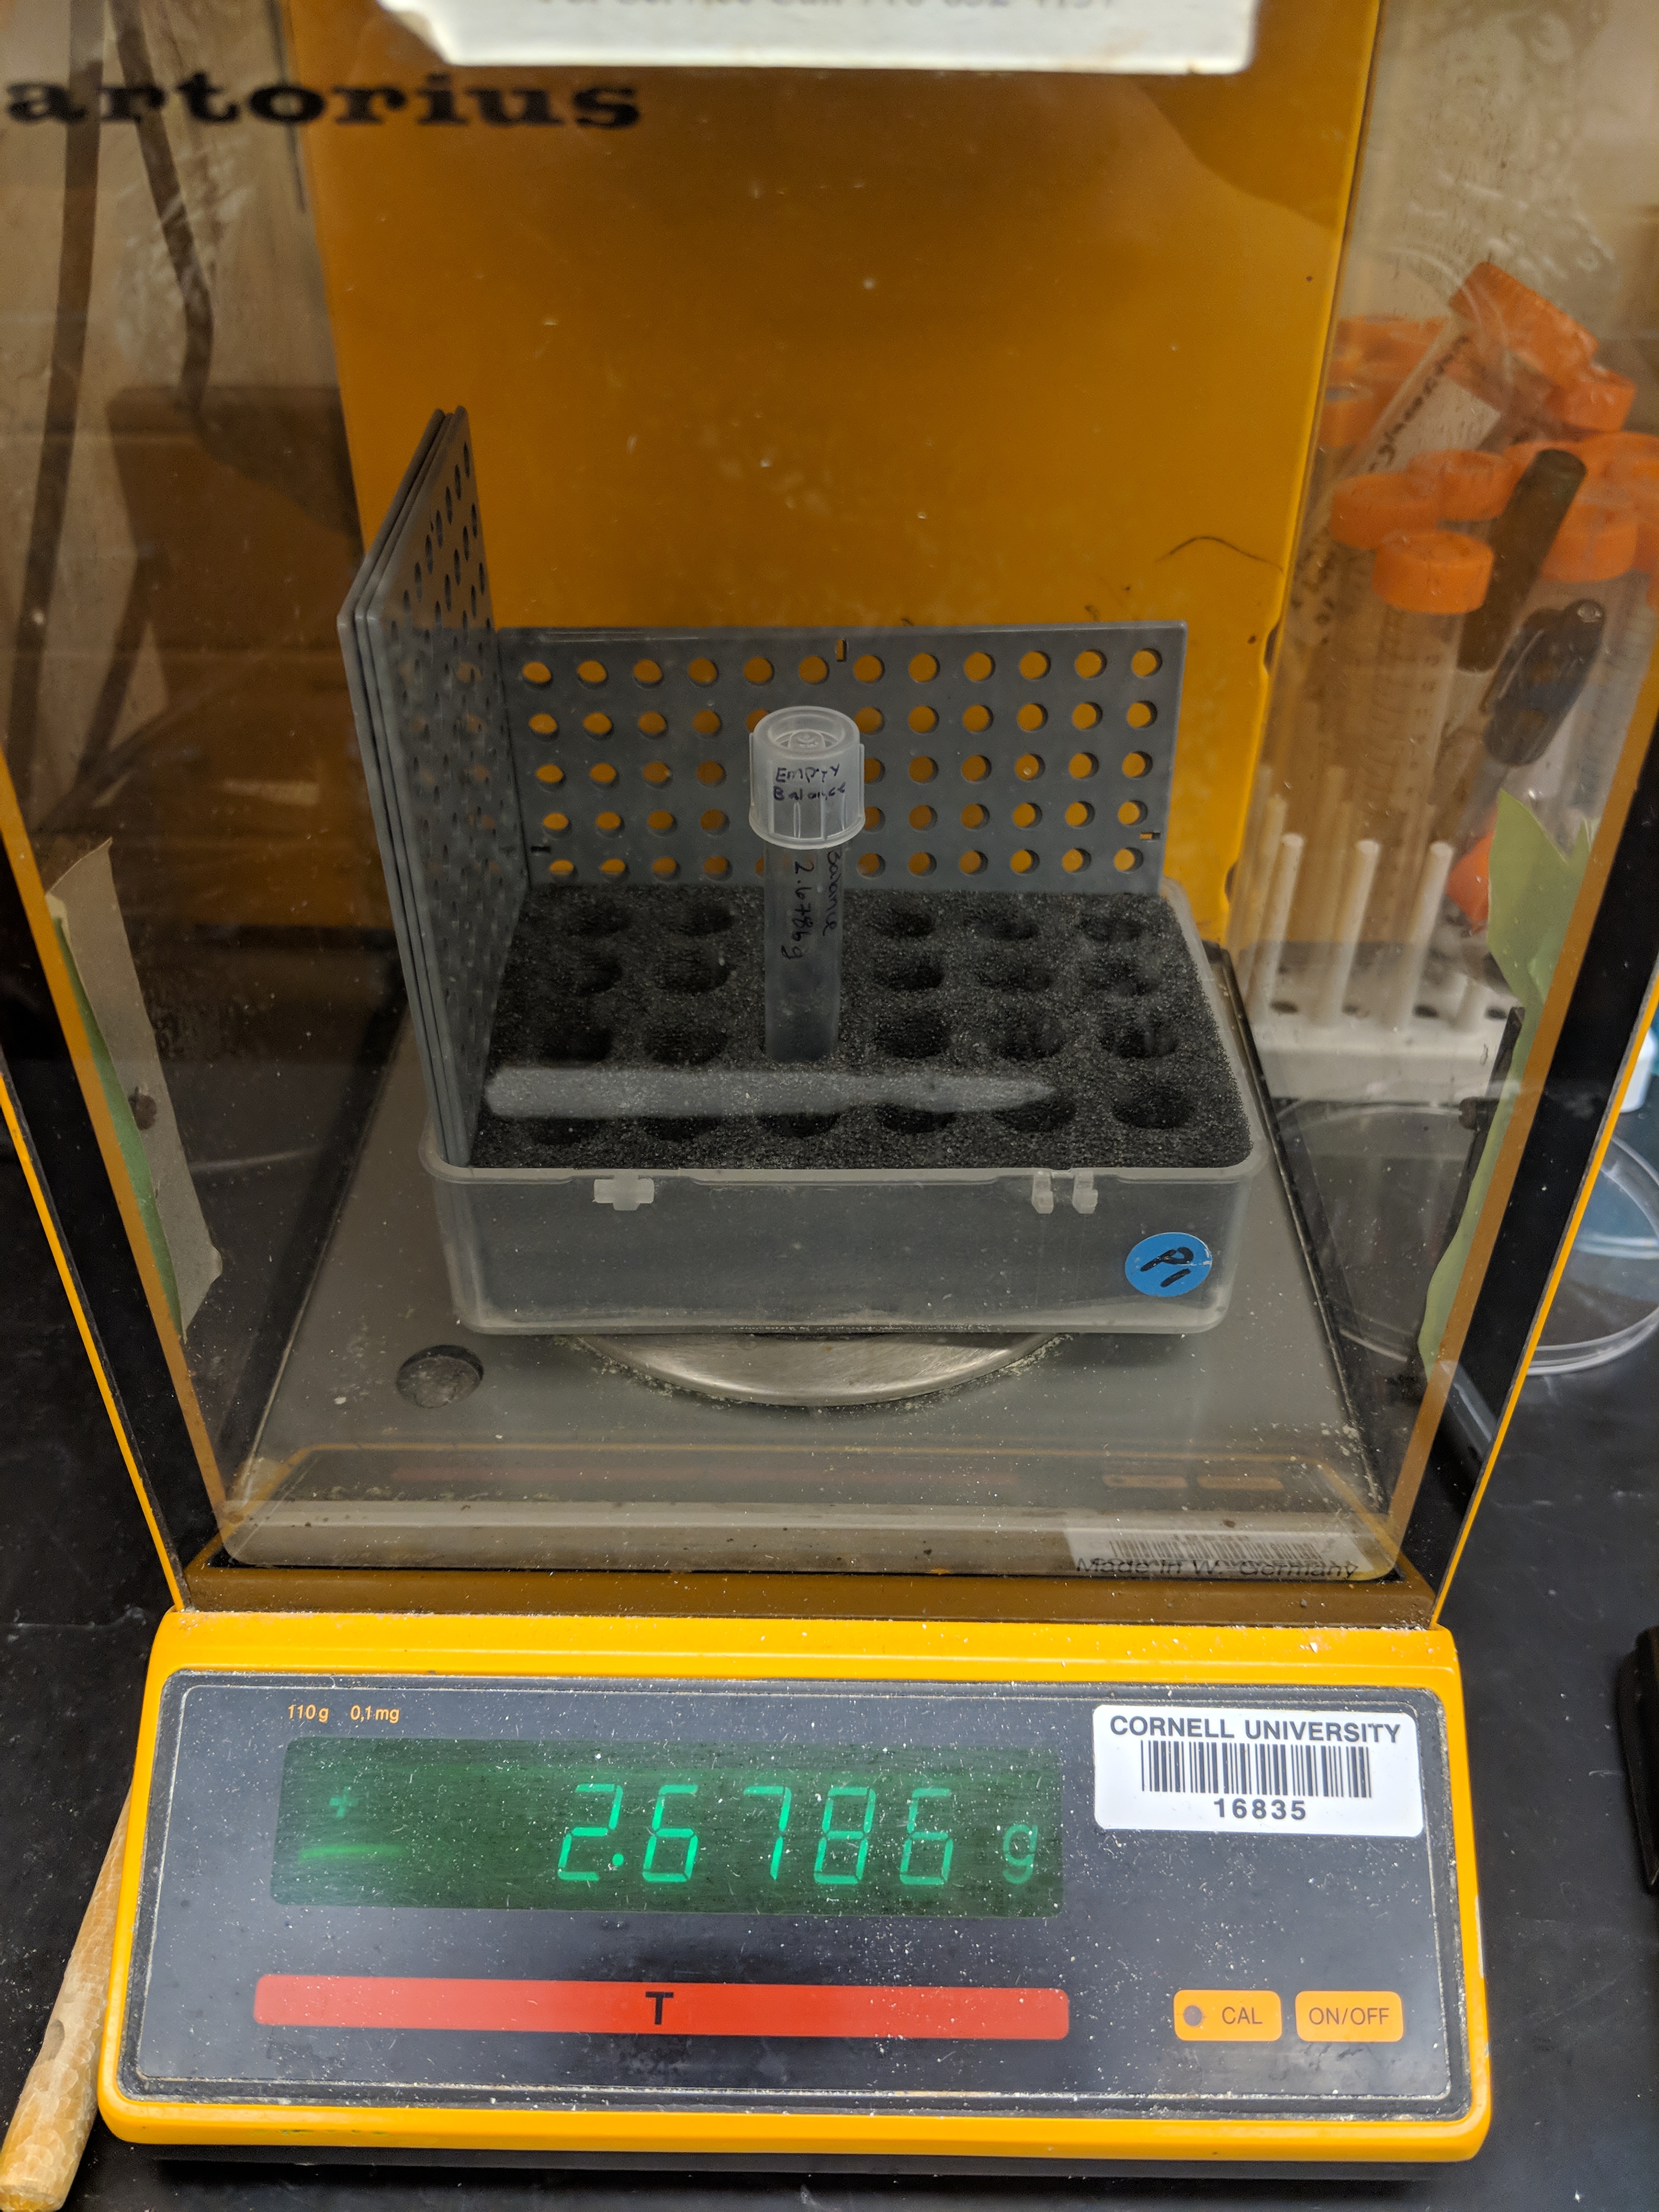 |
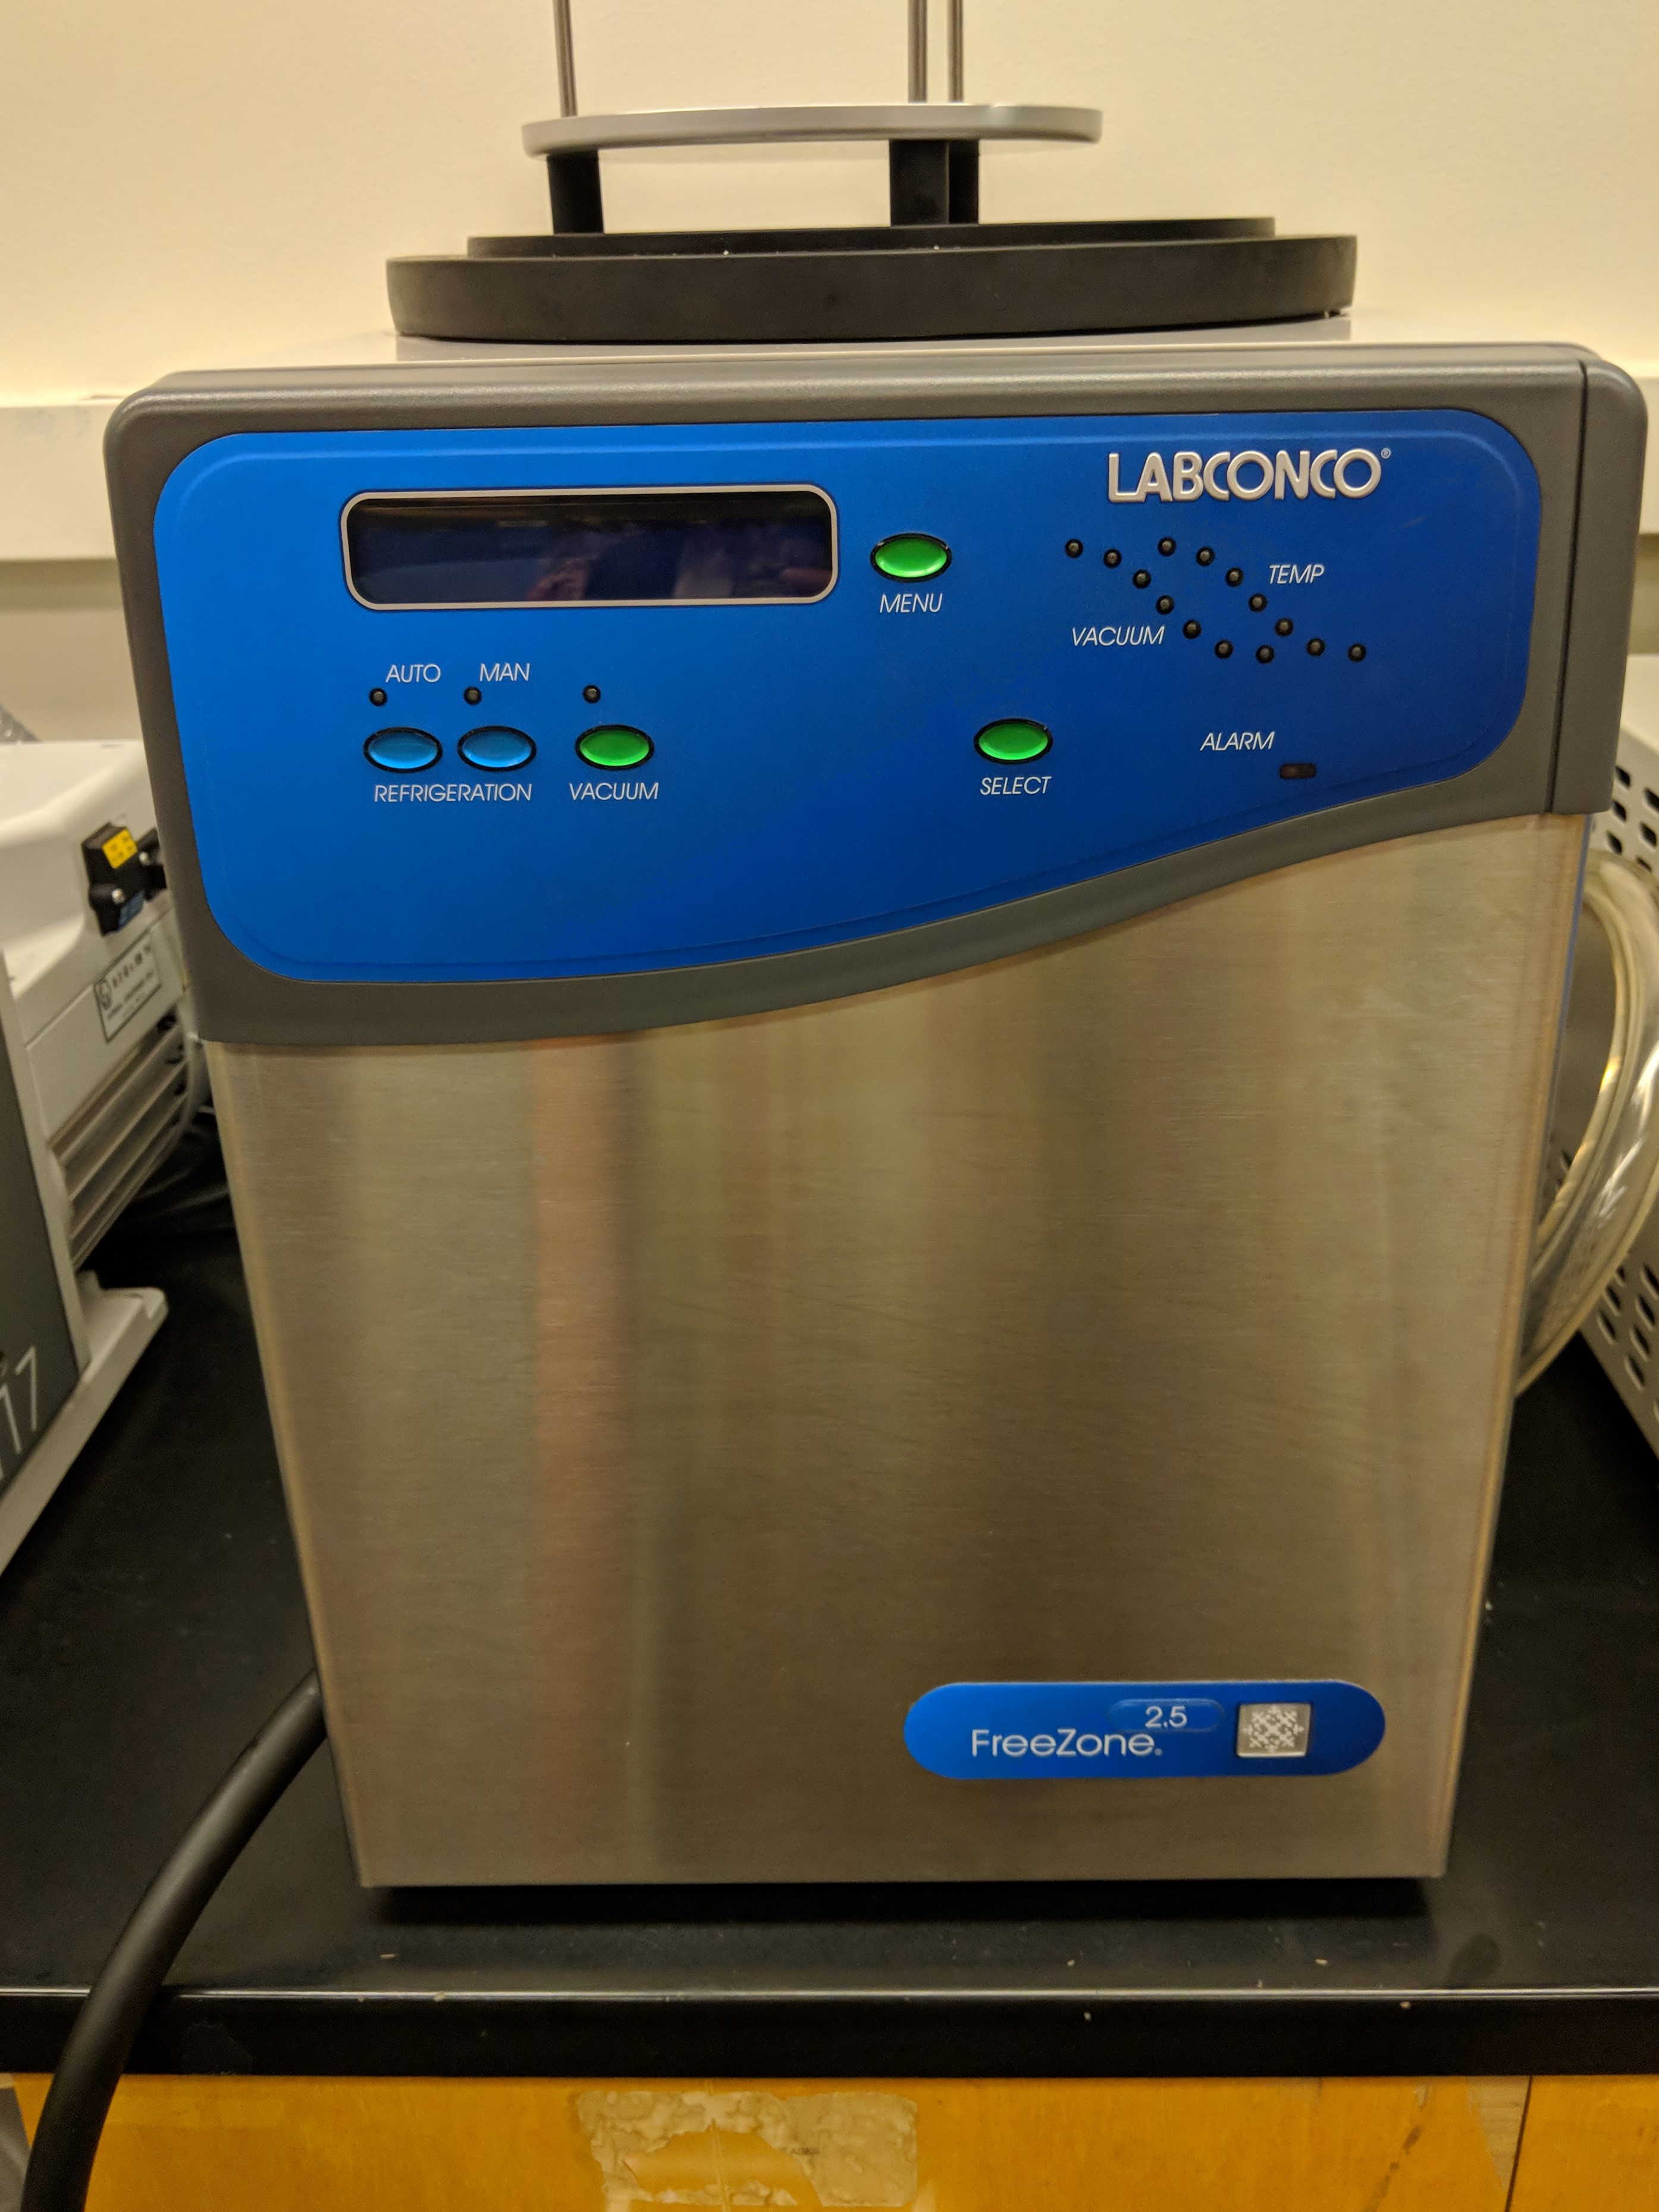 |
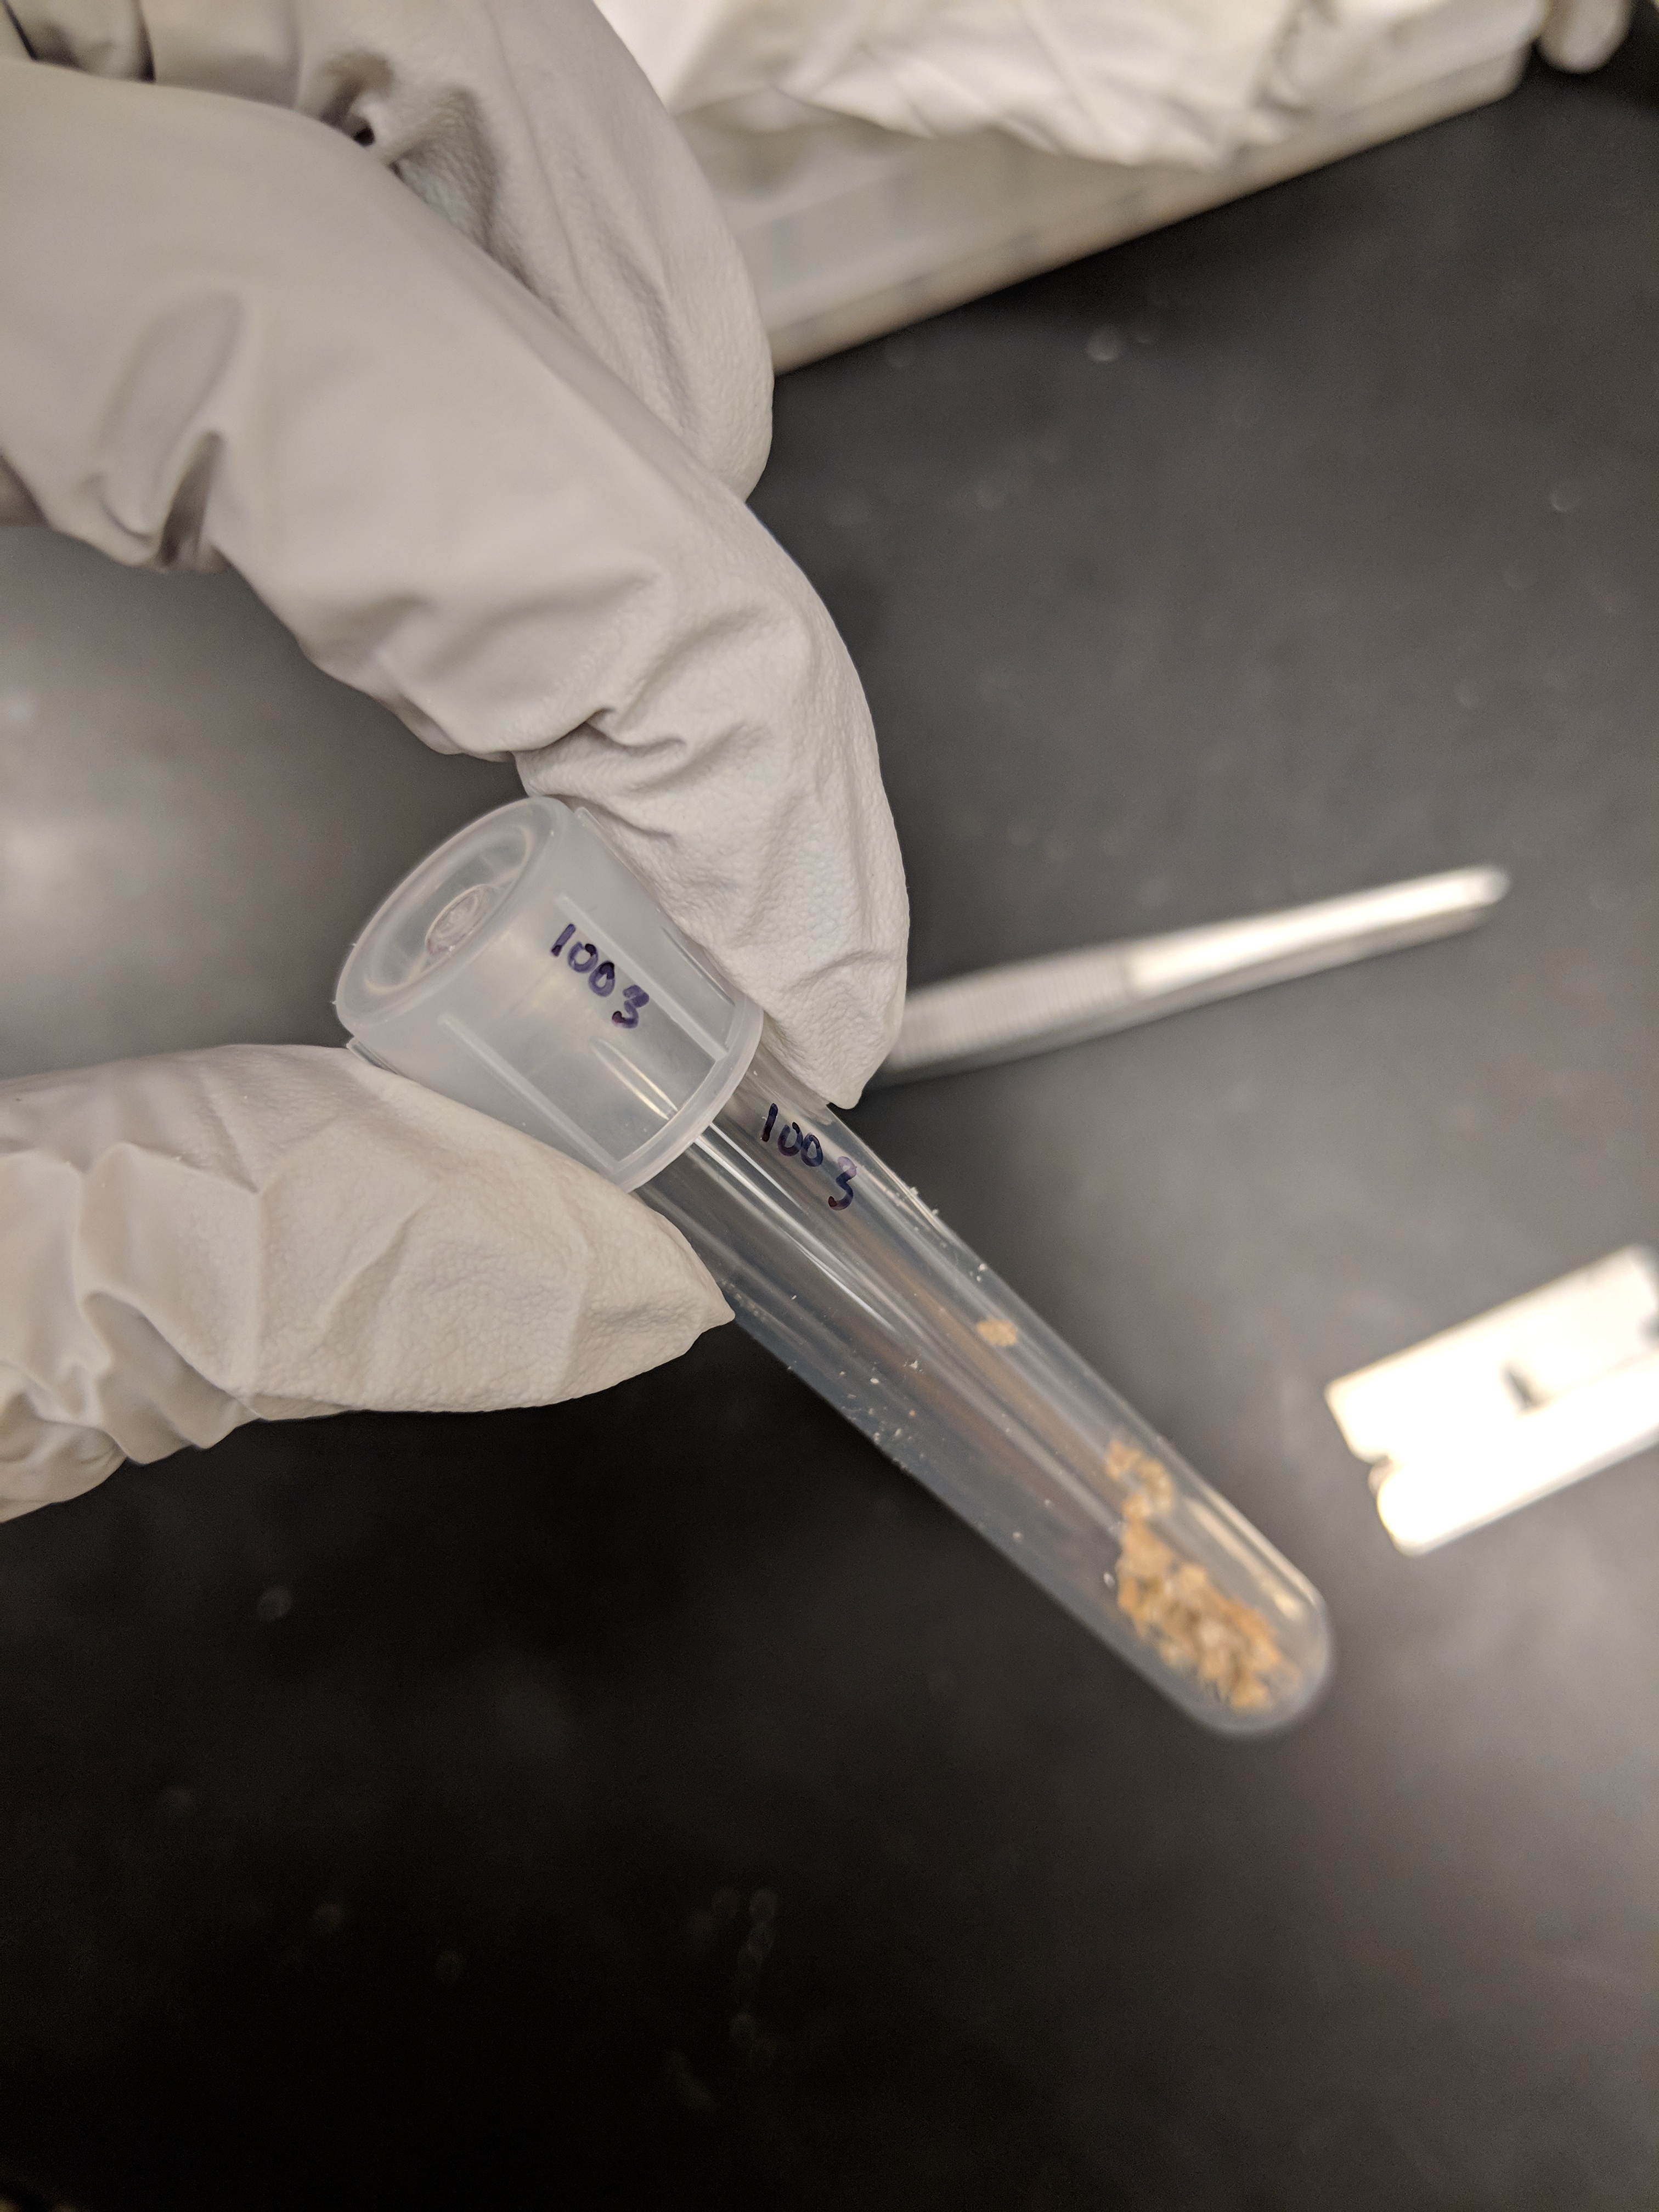 |
Autoclave Protocol 
Water, beakers, filter papers, bottles
STEP 1. LIQUIDS Prepare the items for sterilization:
- glass bottles with caps containing liquid media, water or buffers - liquid filled no more than container fill-line, capped with cap slightly-loosened one turn to prevent loss, autoclave tape on top of lid.
- glass or plastic containers with NO LIDS containing liquid media, liquid media with agar, water or buffers (flasks, beakers, pitchers, etc.) - liquid filled no more than HALF-VOLUME of the container, covered in heavy-duty aluminum foil with no holes and aluminum hanging at least 1 inch over the edge of the opening, autoclave tape on the side of the foil cover overlapping on the glass to secure the foil.
STEP 1. NON-LIQUIDS Prepare the items for sterilization:
- glass bottles with caps - washed, air-dried completely, capped with cap half-loosened, autoclave tape on top of lid.
- plastic large centrifuge bottles with caps - washed, air-dried completely, capped with cap very loosely covering the opening and NOT tightened, autoclave tape on top of lid.
- glass test tubes with caps - washed, air-dried completely, capped firmly, put in non-labeled rack, autoclave tape on front of rack.
- plastic pipet reservoirs/basins - washed, air-dried completely, wrapped in heavy-duty aluminum foil with no exposed corners or edges, 1 piece of autoclave tape on the whole batch only.
- chunking spatulas or other glass/metal utensils - washed, air-dried completely, wrapped in aluminum foil with no exposed corners or edges, 1 small piece of autoclave tape on each item.
- glass or plastic containers with no lids (Flasks, beakers, etc.) - washed, air-dried completely, covered in heavy-duty aluminum foil with no holes and aluminum hanging at least 1 inch over the edge of the opening, autoclave tape on top of the foil cover.
STEP 2. Place all items in autoclave bins - make sure there is enough space between each item inside a bin. Locate and bring with you the pair of orange autoclave gloves.
STEP 3. Use the large grey cart to bring the bins to the autoclave room.
The autoclaves should always be left ON - BUT - sometimes they will be OFF when you are ready to use them. If the autoclave is OFF:
- Check on for notes indicating ‘FIXED’ and not ‘BROKEN’. If OK, proceed -otherwise try a different autoclave.
- TURN ON the autoclave simply by pushing the ‘ON’ button above the keypad and Program screen. Make sure the door is closed. You will hear the steam start to run inside the jacket.
- BEFORE STARTING A CYCLE, make sure the Jacket pressure reads higher than J10P on the program screen (or also look at the pressure gauge above the door). This may take a little longer to start up, but you can proceed to load the autoclave chamber during this time.
STEP 4. If the autoclave is free - proceed to loading:
- Turn door open slightly. STEP BACK AND PUT ON THE AUTOCLAVE GLOVES!!
- CAUTION!! Step back away from the edges of the door to avoid getting burned by the steam, which may immediately vent.
Wearing gloves, pull out the shelf completely to access it from the side.
NOTE: If another lab’s items are in the autoclave you can take the bins out and put them on any open peripheral bench tops in the room. If the contents of the containers are AGAR Media, make sure to notify the owner lab that you removed these from the autoclave. Any other items (liquid without agar and dry items) are OK to leave on the bench top.
Load your bins onto the shelf. Generally, it is better to put the heavier things on the bottom.
- Push the shelf back into the autoclave completely.
- Close the door gently but quickly enough that it is completely closed before the auto-lock engages. You should hear the door lock.
STEP 5. Check that the jacket pressure is greater than 10 psi. Select your cycle according to the posted key.
NOTE: Time depends on the autoclave system you are using
| Type | sterilization | drying |
|---|---|---|
| Liquid Media with agar | 45 min | 30-45 min |
| all other Liquids | 30 min | 30 min |
| Dry Labware | 30 min | 15 min |
STEP 6. Start a timer or note the start time so that you can be sure to retrieve the items shortly after autoclaving finishes.
NOTE: DO NOT leave anything in the autoclave OVERNIGHT!!!
STEP 7. When the cycle ends, the timers will be near zero. Follow the procedure in Step 4 to open the door, retrieve the items WITH AUTOCLAVE GLOVES!!, and bring them back to the lab.
NOTE: Be sure to close the autoclave door completely before leaving.
Lyophilizer 
Set-up/Run
Step 1. Check the drain. Pull the tubes plug and drain the excess water into a tub
If the lyophilizer is in heavy use, it will have a lot of built up moisture.
Step 2. Turn the machine on. On/Off switch is on the right side
Step 3. Turn on the refridgerator
There are three main buttons: Two of them are for cooling. Auto and Man. Use manual so that the vacuum doesnt automatically turn on once cooled.
Wait for the temperature to come down to -40C - -50C (only takes about 10 min)
Warning: the plastic dust cap will fly off, you didnt break anything. It just keeps dust out for long term storage.
Step 4. Add your samples into the chamber and close the chamber. Double check valves are closed. (Notch on top)
Step 5. Turn on vacuum
Step 6. In a few minutes, double check to see if te lyophilizer is pulling vacuum.
Note: It won't reach full green vacuum, because James has it set that way. The second to last light will blink.
Turn-off
Step 1. Break the vacuumm slowly by opening a valve
Step 2. Turn off the vacuum pump button
If you know your samples are finished, you may take them out now and proceed with shutting down lyophilizer.
If the samples are not fully dried, repeat steps 4-6 above for additional hours of freeze drying.
Step 3. Turn off the refridgerator button
Step 4. Turn unit off switch
Remove the chamber and let thaw.
Wait until fully thawed before drainin the excess water.
pH Meter 
STEP 1: Unscrew from buffer and rinse with ddH2O
STEP 2: Press the power button on.
STEP 3: Add the meter into the solution so that the cap is just touching the water.
When the reading stops flashing, it has balanced out its reading (example: 4.20)
STEP 4: Press measure for the meter to read again, then you can add you acids or bases to bring the solution to your desired pH.
To increase the pH: add KOH or NaOH
To decrease the pH: add HCl
the higher the Molar (M) the larger of a change one drop will have (1M fast vs 0.1M slow)
STEP 5: Once your desired pH is reached, remove the meter, rinse thoroughly with ddH2O, and screw on buffer bottle, power off
Extraction for Hormone Measurement (USDA-ARS MU 2017) 
Author: Sven C. Nelson, PhD | Comments: Shantel A. Martinez, PhD
This is the extraction of samples for ABA and GA (and GA precursor) measurement in Columbia, Missouri (USDA-ARS in Oliver Lab) using LCMS. Based on the protocol from RIKEN 2013, but with substitutions for tools that we do not have here. The 2016 version of this protocol used 15 mL tubes, but it has now been further modified to use 5 mL polypropylene round-bottomed tubes (Falcon, product: 352063) for most steps. This allows speed-vac steps to accommodate 40 tubes at once with our new rotor for 5 mL tubes. For larger samples, refer to 15 mL or 50 mL tube protocols. (Max 400 mg sample : 50 mL tubes.)
**START DAY 0**
1. Measure the weight of the freeze-dried samples in 5 mL tube. (desired: 50-100 mg DW)
a. Do this beforehand. Pre-weigh empty tubes before adding ground tissue and then weigh again after freeze drying. Subtract the first from the second to get the total dry weight. Be sure to use the sensitive scale and record all 4 digits after the decimal for your pre-weights.
**↧ ON BENCH OR IN HOOD**
2. Add 2 mL of the 1st extraction solution to each samples
a. For all extraction solutions, use HPLC quality H2O. Don’t store extraction solution as it contains internal standards (ISs) which can degrade over time, make fresh.
b. 1st extraction solution: 80% Acetone containing 1% AcOH and IS-MIX solution
c. Add IS (GA and ABA internal standards) to extraction solution “master mix” so that each sample will get the desired final ng per sample. Record the per-sample ng of IS added.
d. How much IS-MIX to add? Decide based on amount of endogenous GA/ABA expected and peaks within the linear range of detection in test LCMS runs of ISs.
e. Example: If 7 μl final volume (per sample) and injecting 3 μl. If you desire 24 ng/injection, then there should be 56 ng/sample (24 × 7/3). However we are adding 2mL per samples, therefore 56/2 = 28 ng/1mL.
.
| 1st Extraction Solution | Chemical | Concntration | 40mL | 45mL | unit |
|---|---|---|---|---|---|
| Acetone | 80% | 32 | 36 | mL | |
| AcOH | 1% | 400 | 450 | μL | |
| Internal Standard Mix | 24ng/inj & 48ng/inj | 291.2 | 326.8 | μL | |
| H2O | - | 7.6 | 8.55 | mL |
| A | B |
|---|---|
 |
 |
3. After mixing by vortex, incubate the tube for 6 hours (or ON) at 4ºC. (1st incubation)
4. After 6 hours, remove caps, centrifuge samples at 4000 rpm (3399 g) for 10 min.
a. Large centrifuge, max 5100 rpm. Settings: S.51 and set PLA/BUC to BUC (buckets).
b. While spinning 1) label new tubes (tube set #2) 1-40 if you havent already done so, 2) make 2nd Extraction solution (see step 6), and 3) Turn on speedvac with vapor trap (it takes 90min to reach temperature; see step 10).
5. Collect the supernatant in labeled 5 mL tubes (save the supernatent tube set #2 until step 9).
a. Use a 1mL pipette with fresh tips very time.
b. The supernatent tube set #2 can be left on the bench (or in a drawer to keep IS from degrading in the dark) or at 4C if left for a longer period of time.
6. Add 2 mL of the 2nd extraction solution to the pellet (1st tube set) of each sample. with repeat pipettor, reusable tips undr the hood, 1mL x2.
a. 2nd extraction solution: 80% Acetone containing 1% AcOH. Make this with the units on the falcon tube).
b. Make 3x 50mL falcon tubes, the solution can sit over time. c. re-cap tubes for next step.
| 2nd Extraction Solution | Chemical | Concntration | 50mL | unit |
|---|---|---|---|---|
| Acetone | 80% | 40 | mL | |
| AcOH | 1% | 500 | μL | |
| H2O | - | fill to 50mL | mL |
7. After mixing by vortex, incubate the tubes for 10 min at 4ºC. (2nd incubation) Votex time: count to 10
8. Centrifuge samples without caps at 4000 rpm (3399 g) for 10 min.
9. Collect the supernatant (tube set #1) and add to the same 5 mL tube (tube set #2) from step 5 (discard pellet)
a. Use a 1mL pipette with fresh tips very time.
10. Evaporate extraction solution using speedvac in lab (new 40 × 5 mL tube rotor)
a. 43-45°C, vacuum level 20.0, heat time 4hrs, time required: ≈3 hours (it’s ok if ≈0.5 mL or less remaining) b. To turn speed vac on: switch speedvac switch on, vapor trap swtich on, pump switch on (if it didnt turn on with the vapor trap)
c. Change the rotor 0-12 that fits 40 5mL falcon tubes.
d. The vapor trap needs to reach the temperature -104C (takes ~90min)
**↧ IN HOOD**
11. Add 2 mL of Hexane to the dried down sample.
We are using the Hexane to pull out un-wanted junk
12. Add 2 mL of 50% Acetonitrile (MeCN) and vortex.
a. Solution will form two layers or can (but not necessary) be centrifuged at 8000 rpm for 5 min
13. (3×) Remove the upper layer (Hexane) and discard, add 2 mL Hexane.
a. 3× = do this a total of 3 times, check the first box and repeat two more times: ☐ ☐ ☐
b. Do not add Hexane on the 3rd time and move on to step 14
c. In layman's terms: 1) remove Hexane layer, discard, 2) add Hexane, vortex, remove Hexane layer, discard and 3) add Hexane, vortex, remove Hexane layer, discard. Proceed to Step 14
14. Evaporate extraction solution using speedvac (no heat, run overnight OR 43°C, ≈3-4 hr).
a. For the next day: Make PVP solution (50/50 of PVP and HPLC-grade water) if needed.
PREP FOR TOMORROW: Make 0.5M K2HPO4 soln (see step 15 notes); Label 2 sets of tubes; Make 1% AcOHaq
**↧ ON BENCH**
15. Add 0.5 mL 0.5M K2HPO4 to the dried down sample, vortex, and allow to dissolve.
a. Add 4.355 g to total of 50 mL of water; MW = 174.18
b. While waiting for samples to dissolve, prepare and condition the PVP columns (step 16)
16. Conditioning the PVP column (PVP = Poly(vinylpolypyrrolidone), ex: Sigma prod. 77627)
a. Fill Varian Reservoir Frits 1 mL columns (Agilent 12131013) to 1/2 volume with PVP
i. To do this, add 1 mL of 50/50 mix of PVP and HPLC-grade water to column.
ii. Use a syringe with column adapter to gently push through some water to start the gravity-flow of liquid through the column
iii. Check pH of flow through with lithmus/pH paper, it is probably about pH 7
iv. Add ≈500μl each time of 0.5M K2HPO4 up to 2 mL (4 times) or until the pH gets to about pH8~9 (Check flow-through with litmus/pH paper) ☐ ☐ ☐ ☐
17. Collect flow-through: Once dissolved load the 0.5 mL sample in the PVP column, add another 0.5 mL 0.5M K2HPO4 to the sample tube and add this to the column. ☐ ☐
a. (optional) If sample is dirty, can first pass through and empty 3mL Varian Reservoir Frits column (0.5 mL × 2) to remove larger debris, then add that 1 mL to the PVP columns**
b. lift rack to see if liquid went through & tap to let last drop fall.
c. PVP/column can be discarded in regular trash
18. Collect flow-through: add 2 mL 0.5M K2HPO4 (4 × 500μl) to elute. ☐ ☐ ☐ ☐
a. Total volume of flow-through is 3 mL
**↧ IN HOOD**
Turn on speed vac + vapor trap (90min prior to step 24)
19. Add 6N HCl 100 - 300 μl to the sample until the pH is 2 - 3, check by litmus/pH paper.
a. add 100uL to all, spin uncapped, check multiple tube pH's. b. add 100uL to the #1 tube, check pH, add 100uL more if you need more to get 2-3 pH.
c. then add 200uL to all of the tubes (or 100uL if you only needed 100uL more instead of 200uL).
d. spin uncapped, check pH, recap, and set in the dark drawer, and procees to step 20
20. Conditioning the 3 mL HLB column (Oasis HLB 3cc Vac Cartridge, Waters WAT094226)
a. Add 3 mL of MeCN and discard flow-through
b. Then 3 mL of MeOH and discard flow-through
c. Then 3 mL of 1% AcOHaq and discard flow-throughColumns are snug in the column holder, dont need to push all the way down.
Constantly remove the waste solution into properly labeledWaste Container
| Chemical | Conc. | Amount | unit |
|---|---|---|---|
| AcOH | 1% | 1 | mL |
| LCMS H2O | - | 99 | mL |
21. Discard flow-through: Load the extracts to HLB (ABA/GA is retained in column).
22. Discard flow-through: Add 2 mL of 1% AcOHaq twice (2× wash step). ☐ ☐
a. Near the end, you can use the syringe to push the column solution all the way through, to get that extra last bit out. However push slowly and steady.
23. Collect flow-through: Move columns above new 5 mL tubes, add 2 mL 80% MeCN containing 1% AcOH twice (2× elution step). ☐ ☐
4mL/sample * 40 samples = 160mL
| Chemical | Concntration | 160mL | unit |
|---|---|---|---|
| MeCH | 80% | 128 | mL |
| AcOH | 1% | 1.6 | mL |
| H2O | - | 30.4 | mL |
24. Evaporate extraction solution using speedvac (43°C, run overnight OR 43°C, ≈4-5 hr). no liquid left
**START DAY 4**
**↧ IN HOOD**
25. Add 0.5mL MeOH to each of the dried down samples, pellet will dissolve easily, vortex briefly to mix.
26. Conditioning the 1 mL DEA columns (Bond Elut DEA cartridge, Agilent 14102016)
a. Add 1 mL MeOH and discard flow-through
27. Discard flow-through: Load the extracts into the DEA columns (ABA/GA is retained).
28. Discard flow-through: Add 1 mL MeOH three times (3× wash). ☐ ☐ ☐
29. Collect flow-through: Move columns above new 5 mL tubes: Add 1 mL MeOH containing 0.5% AcOH three times (3× elution step). ☐ ☐ ☐
| Chemical | Concntration | 150mL | unit |
|---|---|---|---|
| MeOH | - | 150 | mL |
| AcOH | 0.5% | 750 | μL |
30. Evaporate extraction solution using speedvac (43°C, ≈2 hr).
a. Place at 4°C if dry before lunch.
31. Add 0.5 mL of 50% Chloroform 50% ethylacetate containing 0.1% AcOH to the dried down samples, vortex briefly.
32. Conditioning 1 mL Sep-Pac Silica columns (Sep-Pac Silica 1cc, Waters WAT023595)
a. Add 3 × 1 mL of 50% Chloroform 50% ethylacetate 0.1% AcOH (discard) ☐ ☐ ☐
| Chemical | Concntration | 440mL | unit |
|---|---|---|---|
| Chloroform | 50% | 220 | mL |
| Ethylacetate | 50% | 220 | mL |
| AcOH | 0.1% | 440 | μL |
33. Collect flow-through: Load extracts to Silica and collect in pre-labeled 5 mL tubes.
34. Collect flow-through: Add 1 mL 50% Chloroform 50% ethylacetate containing 0.1% AcOH twice (2× elution step; total 2.5 mL in tube) ☐ ☐
35. Evaporate extraction solution using speedvac (43°C, ≈1 hr).
Can prep the LC/MS vials in for step 36
*A time you can store @ RT for 1-2hr OR @4C >2hrs*
36. Resuspend in 200μl MeOH, transfer to LC/MS vial insert, dry by speedvac (43°C, 30 m).
For steps 36 and 37, you can use a speedvac without a vapor trap.
37. Repeat step 36: Add 200μl MeOH, transfer from 5 mL tube to vial insert, and dry down.
a. Store in this form and resuspend for run.
38. For small injection sizes (eg 3μl per inj), resuspend in X μl of 99% MeCN 1% AcOH.
(X = inject vol × # of inj + extra; ex: 7μl; higher MeCN is needed for GA12/12-Ald peaks)
For larger injections (eg 20μl per inj), resuspend in X μl of 15% MeCN 1% AcOHaq.
PROCEED TO RUNNING SAMPLES ON LCMS
Chemical Locations
acetone under hood in other lab area
acoh in hood next to lcms
water aliqout in 50ml hplc grade tube, so its easier to use. water can be pipetted
6M HCL Acid cabinet
Columns HLB 3mL/3cc Sven LCMS Column drawer
K2HPO4 stock inorganics cupboard; 0.5M solution, above benc.
PVP Organics cupboard ~110um particle size
1% AcOHaq larger 1L brown bottle
Bottles of LCMS water, are under desk area, large brown bottles of water (if I get low on it, tell kate and she will ordere more)
Internal-standard mix solution in the -20C Sven Box
ga's IS stock tip box 50ug/ml
+aba IS stock tip box 1mg/ml
LCMS Sequence Parameters 
Example Parameters to keep record of:
Run Pameters
| Folder | FileName | Method | Injection | |||
|---|---|---|---|---|---|---|
| NameDate | Date_01_1 | SV_PHENYL150X3MM3UM_ABA_GA_SIM4_Shantel.M | 3uL |
Sample Sequence
| Tube | pos | reps | sample |
|---|---|---|---|
| ACN | 91 | 1 | MeCN |
| 43 | 51 | 3 | sample_001 |
| 42 | 52 | 3 | sample_002 |
| 41 | 53 | 3 | sample_003 |
| ACN | 91 | 2 | MeCN |
Updating Software Sequence Info
SequenceSequence ParametersSubdirectory:NameDateClick Prefix cell (will ask to create,yes). Prefix should be the file nameDate_01_and the counter will start with001
Check post seq command:STANDBYFor a single run. If I wanted to run multiple runs, and whaat to run right after one another. You can change WHILE your sequence is running. Uncheck it if I dont want the LCMS to go to standby.OKSequenceSequence TableClick a cell and you can edit the cell. Input the pos intovialcolumn. Highlight a row to cut it out. Insert to add more rows. EditSample Name,Inj/Vial, andMethod Nameneeds to be my prefered method (all samples HAVE TO BE the same method). Once done, clickOKa. This can be done ahead of time during the extraction method.
Save Sequence Template:
SequenceSave Sequence Template As...Rename File NameDate_Hormone_User_Set.SOK(If you are re-saving it, clickYesto over-write the old file.- Once the dilution samples are dried down, re-suspend to 7uL in 1% AcOH in MeCN (Assuming your sample is to be diluted to a final volume of 7uL, this may change on your preference).
- Place the samples in the LCMS tray and record the position in the
sample sequence tableabove. - Double check
Sequence Parameters, andSequence Table
LCMS Machine Run & Configuration 
The basis of the LC : sample/hormone will flow based on both the chemistry in the column AND the size.
And the change of ratios of the solvents, you can push/pull out as slow or fast. Because if you have a low % solv B, things come out slower, but close peaks together seperate (more resolution of peaks close). But if you have a high % solvent B, things will come out faster. The same things with the disposal columns, but we arent keeping all, getting rid of things, this time we what to spread the hormones out, so when it gets shot out to the mass spec, it reads the masses.
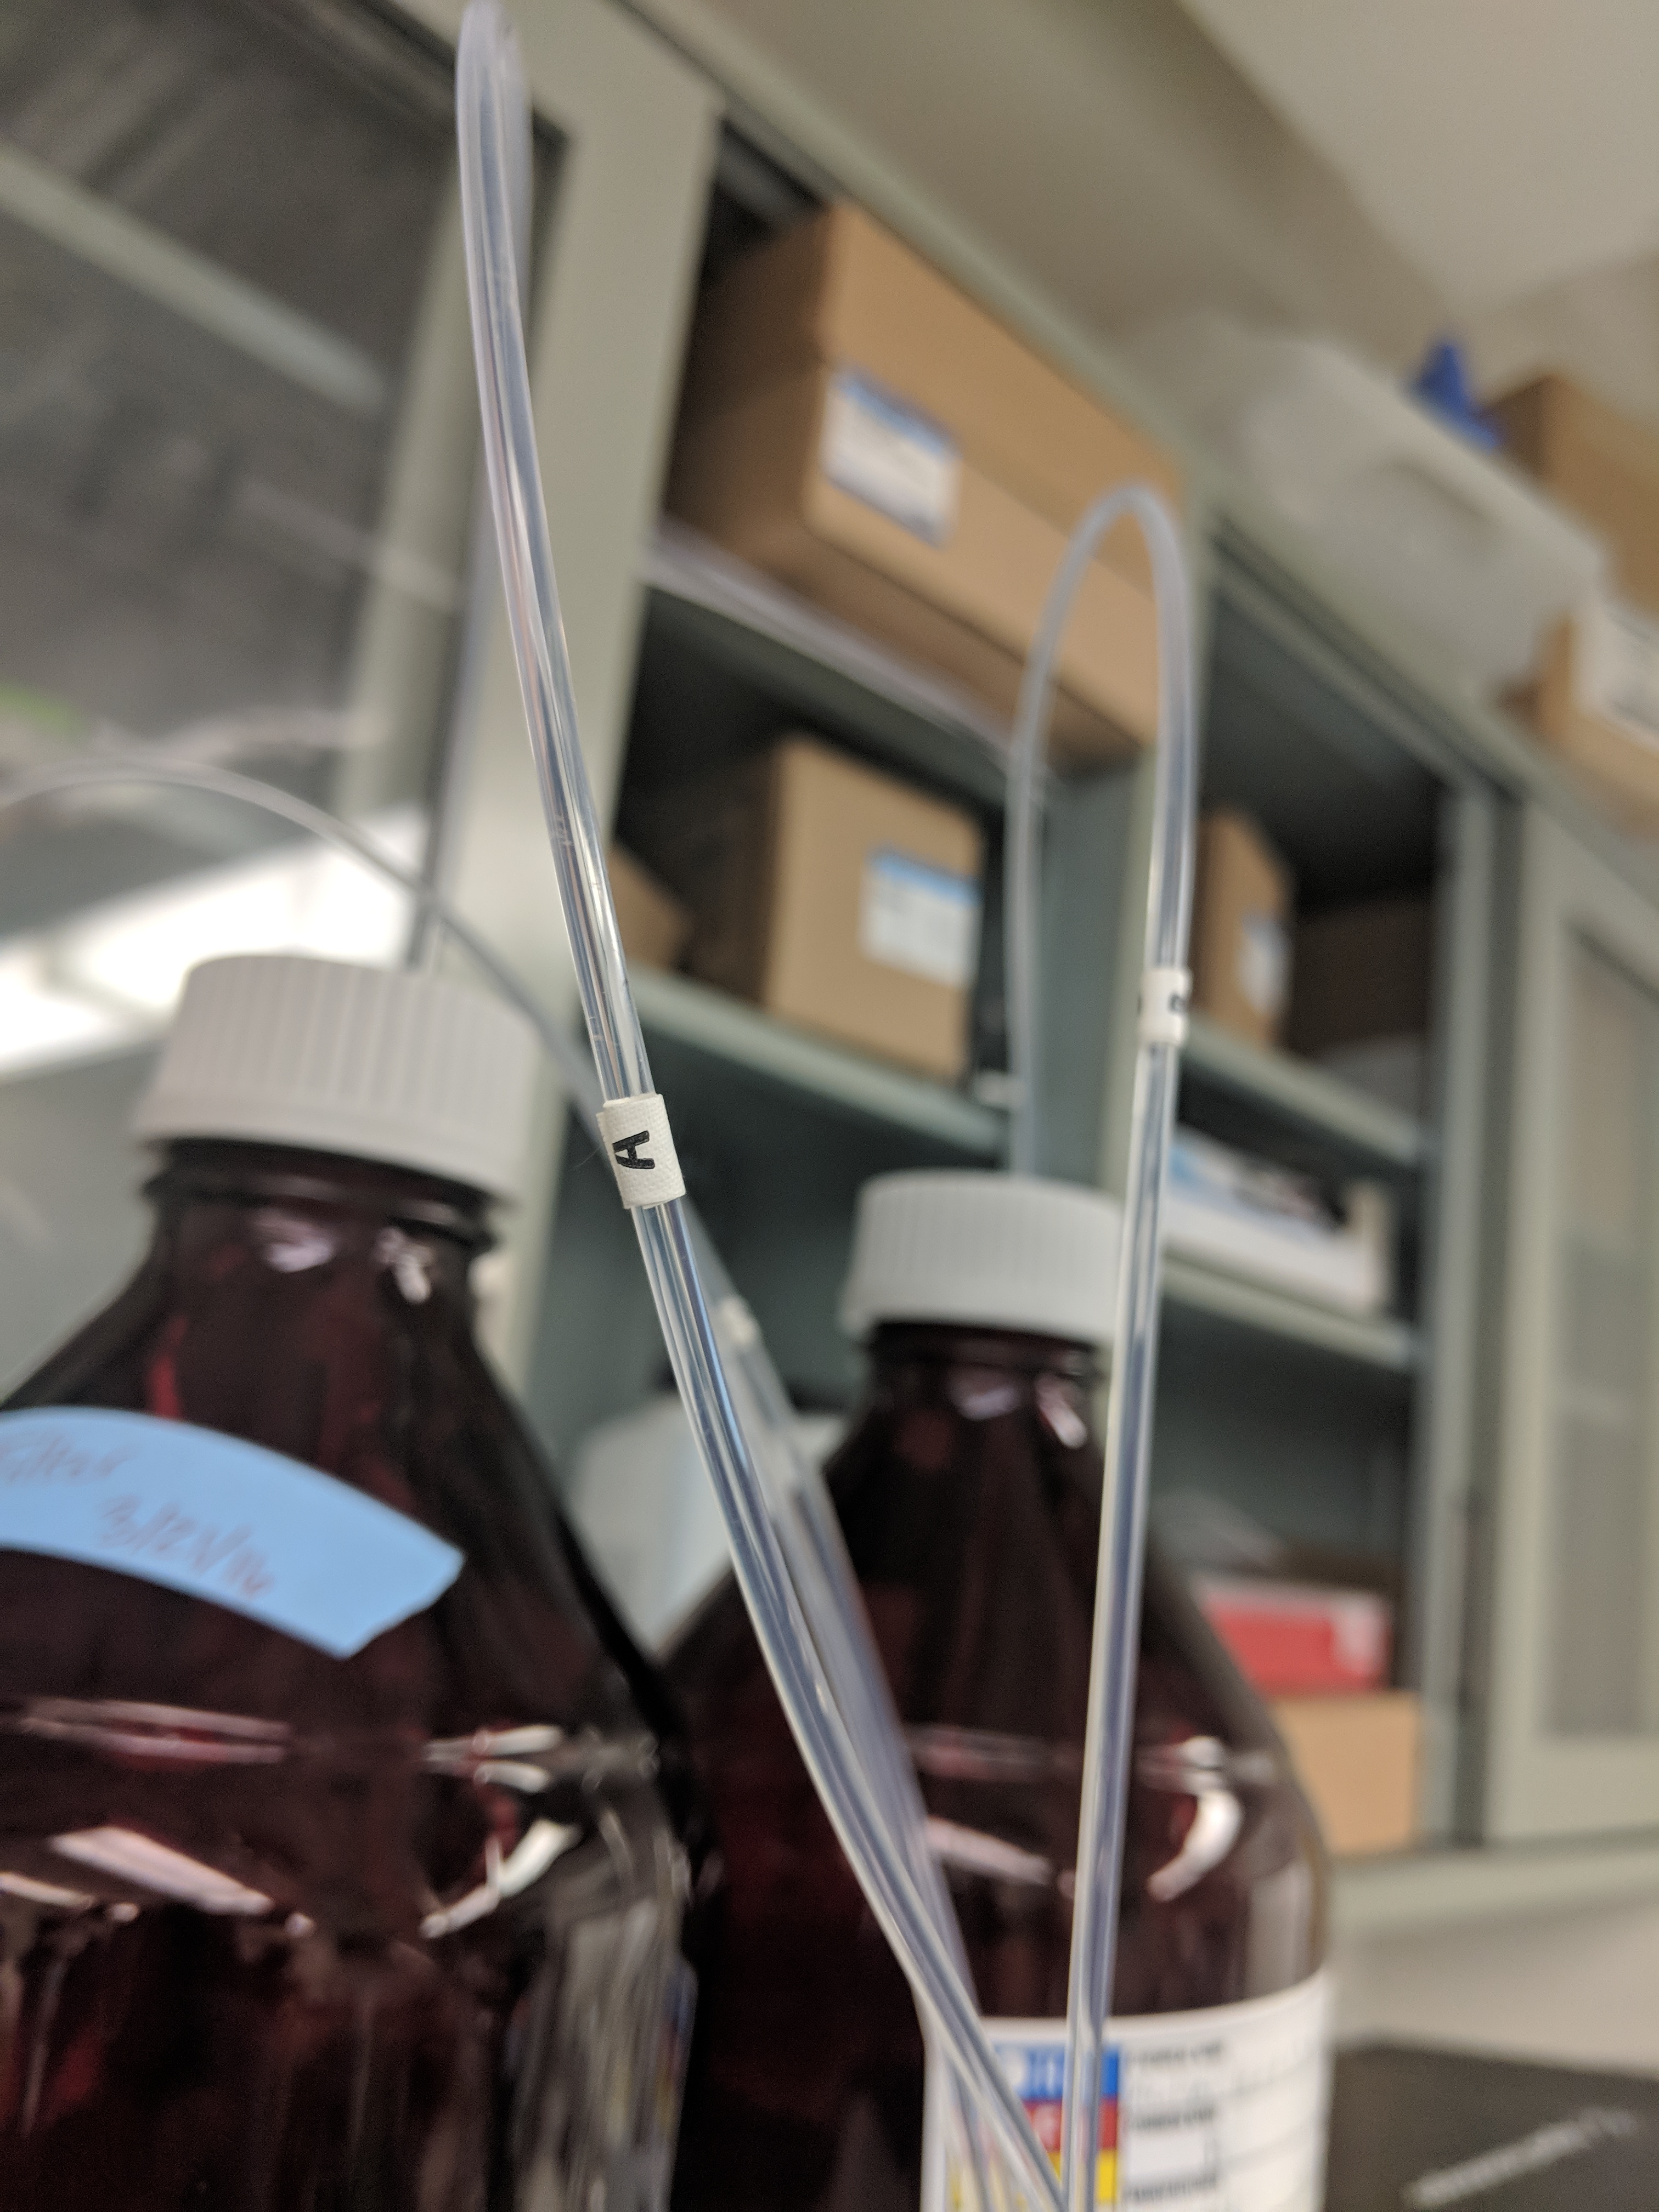
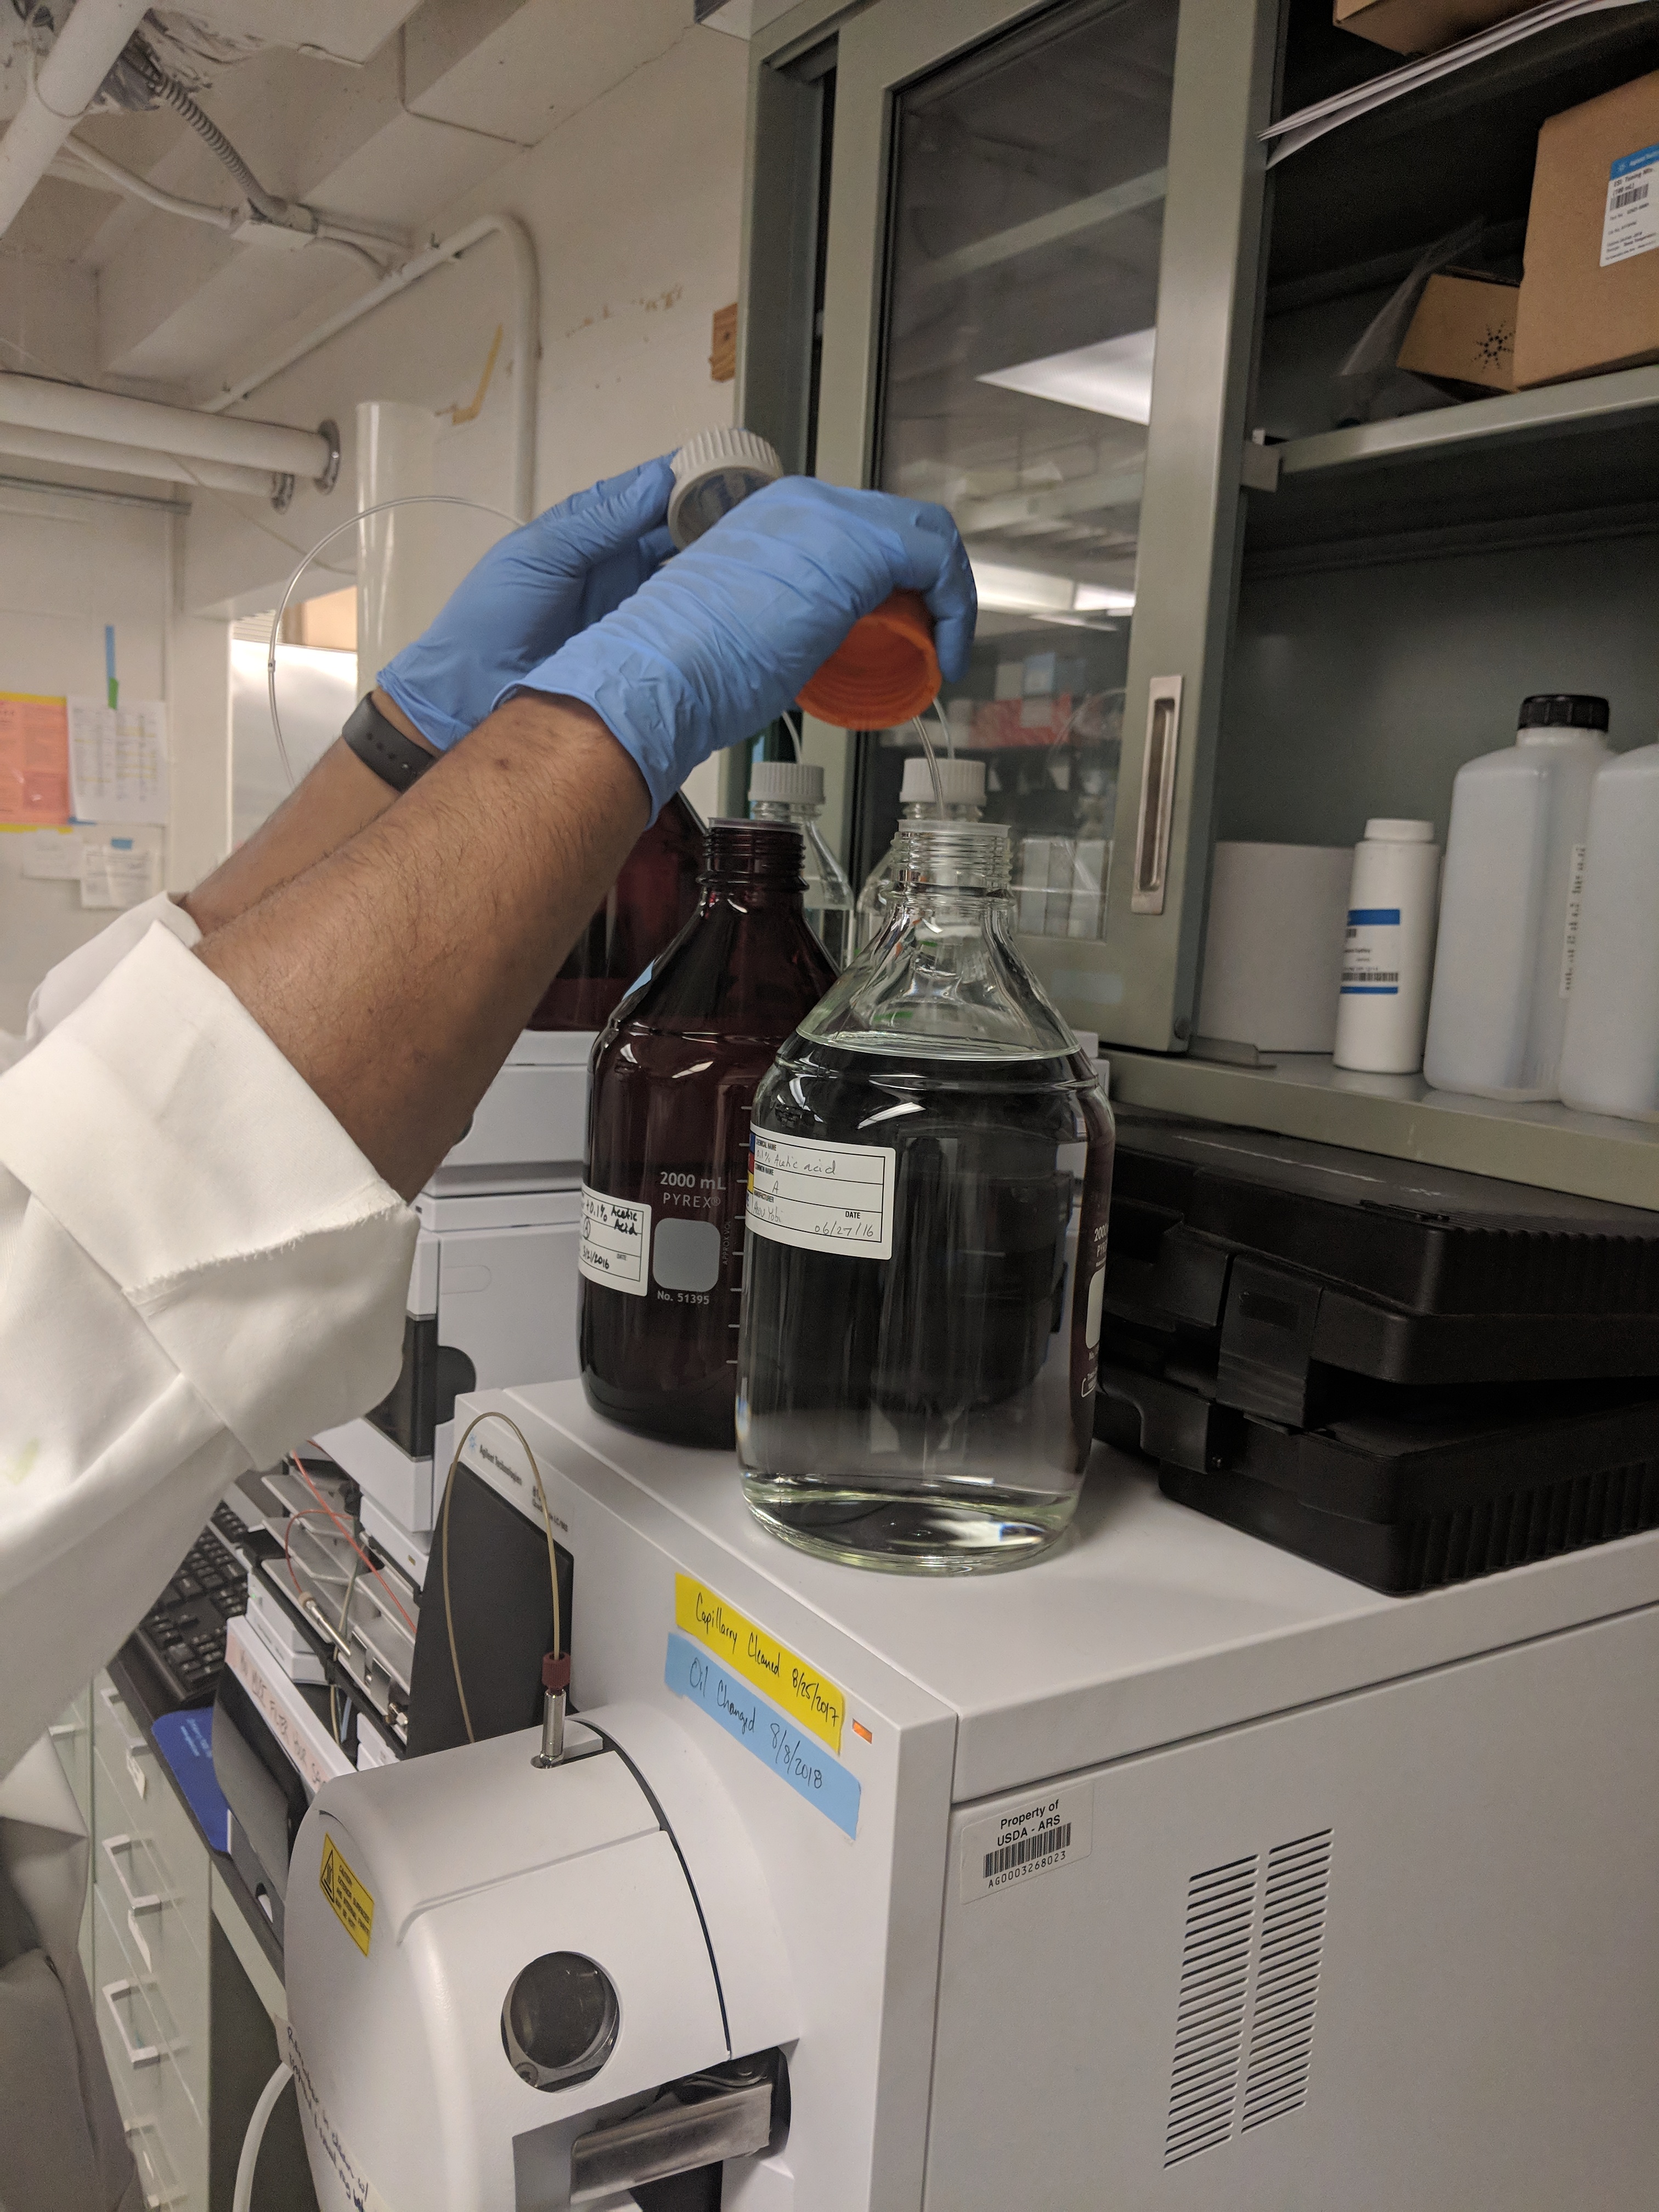
1. LCMS Chemicals
First, Do we have enough solvents to run the LCMS
Use HPLC graduate cylinder (in the hood). Rinse the cylinder with HPLC grade water before use
When switching jars while on, turn the tube knob to waste
| water + 0.1% Acetic Acid | Acetonitrile + 0.1% Acetic Acid | |||
|---|---|---|---|---|
| total | 1700mL | 1700mL | ||
| Acetic Acid | 1.7mL | 1.7mL | ||
| H2O/MeCN | Fill to total | Fill to total | ||
| Must mix very well or it will effect your results |
Turn knob back to column.
MOST IMPORTANT THING TO REMEMBER WHEN CHANGING SOLVENTS
When/if you change the solvents, you need to tel lthe computer how much is in the bottles. The machine will stop the run before it gets to 0mL.
- Quant. Pump window click on the bottle letter. Ex: A change to 2.0 liters (full) with a max of 2.0 liters.
- When you click, you can change all of the final volumes in the pop-up window.
- Click Ok. Then the green liquid levels in the graphic will change.
| A | B | C | D |
|---|---|---|---|
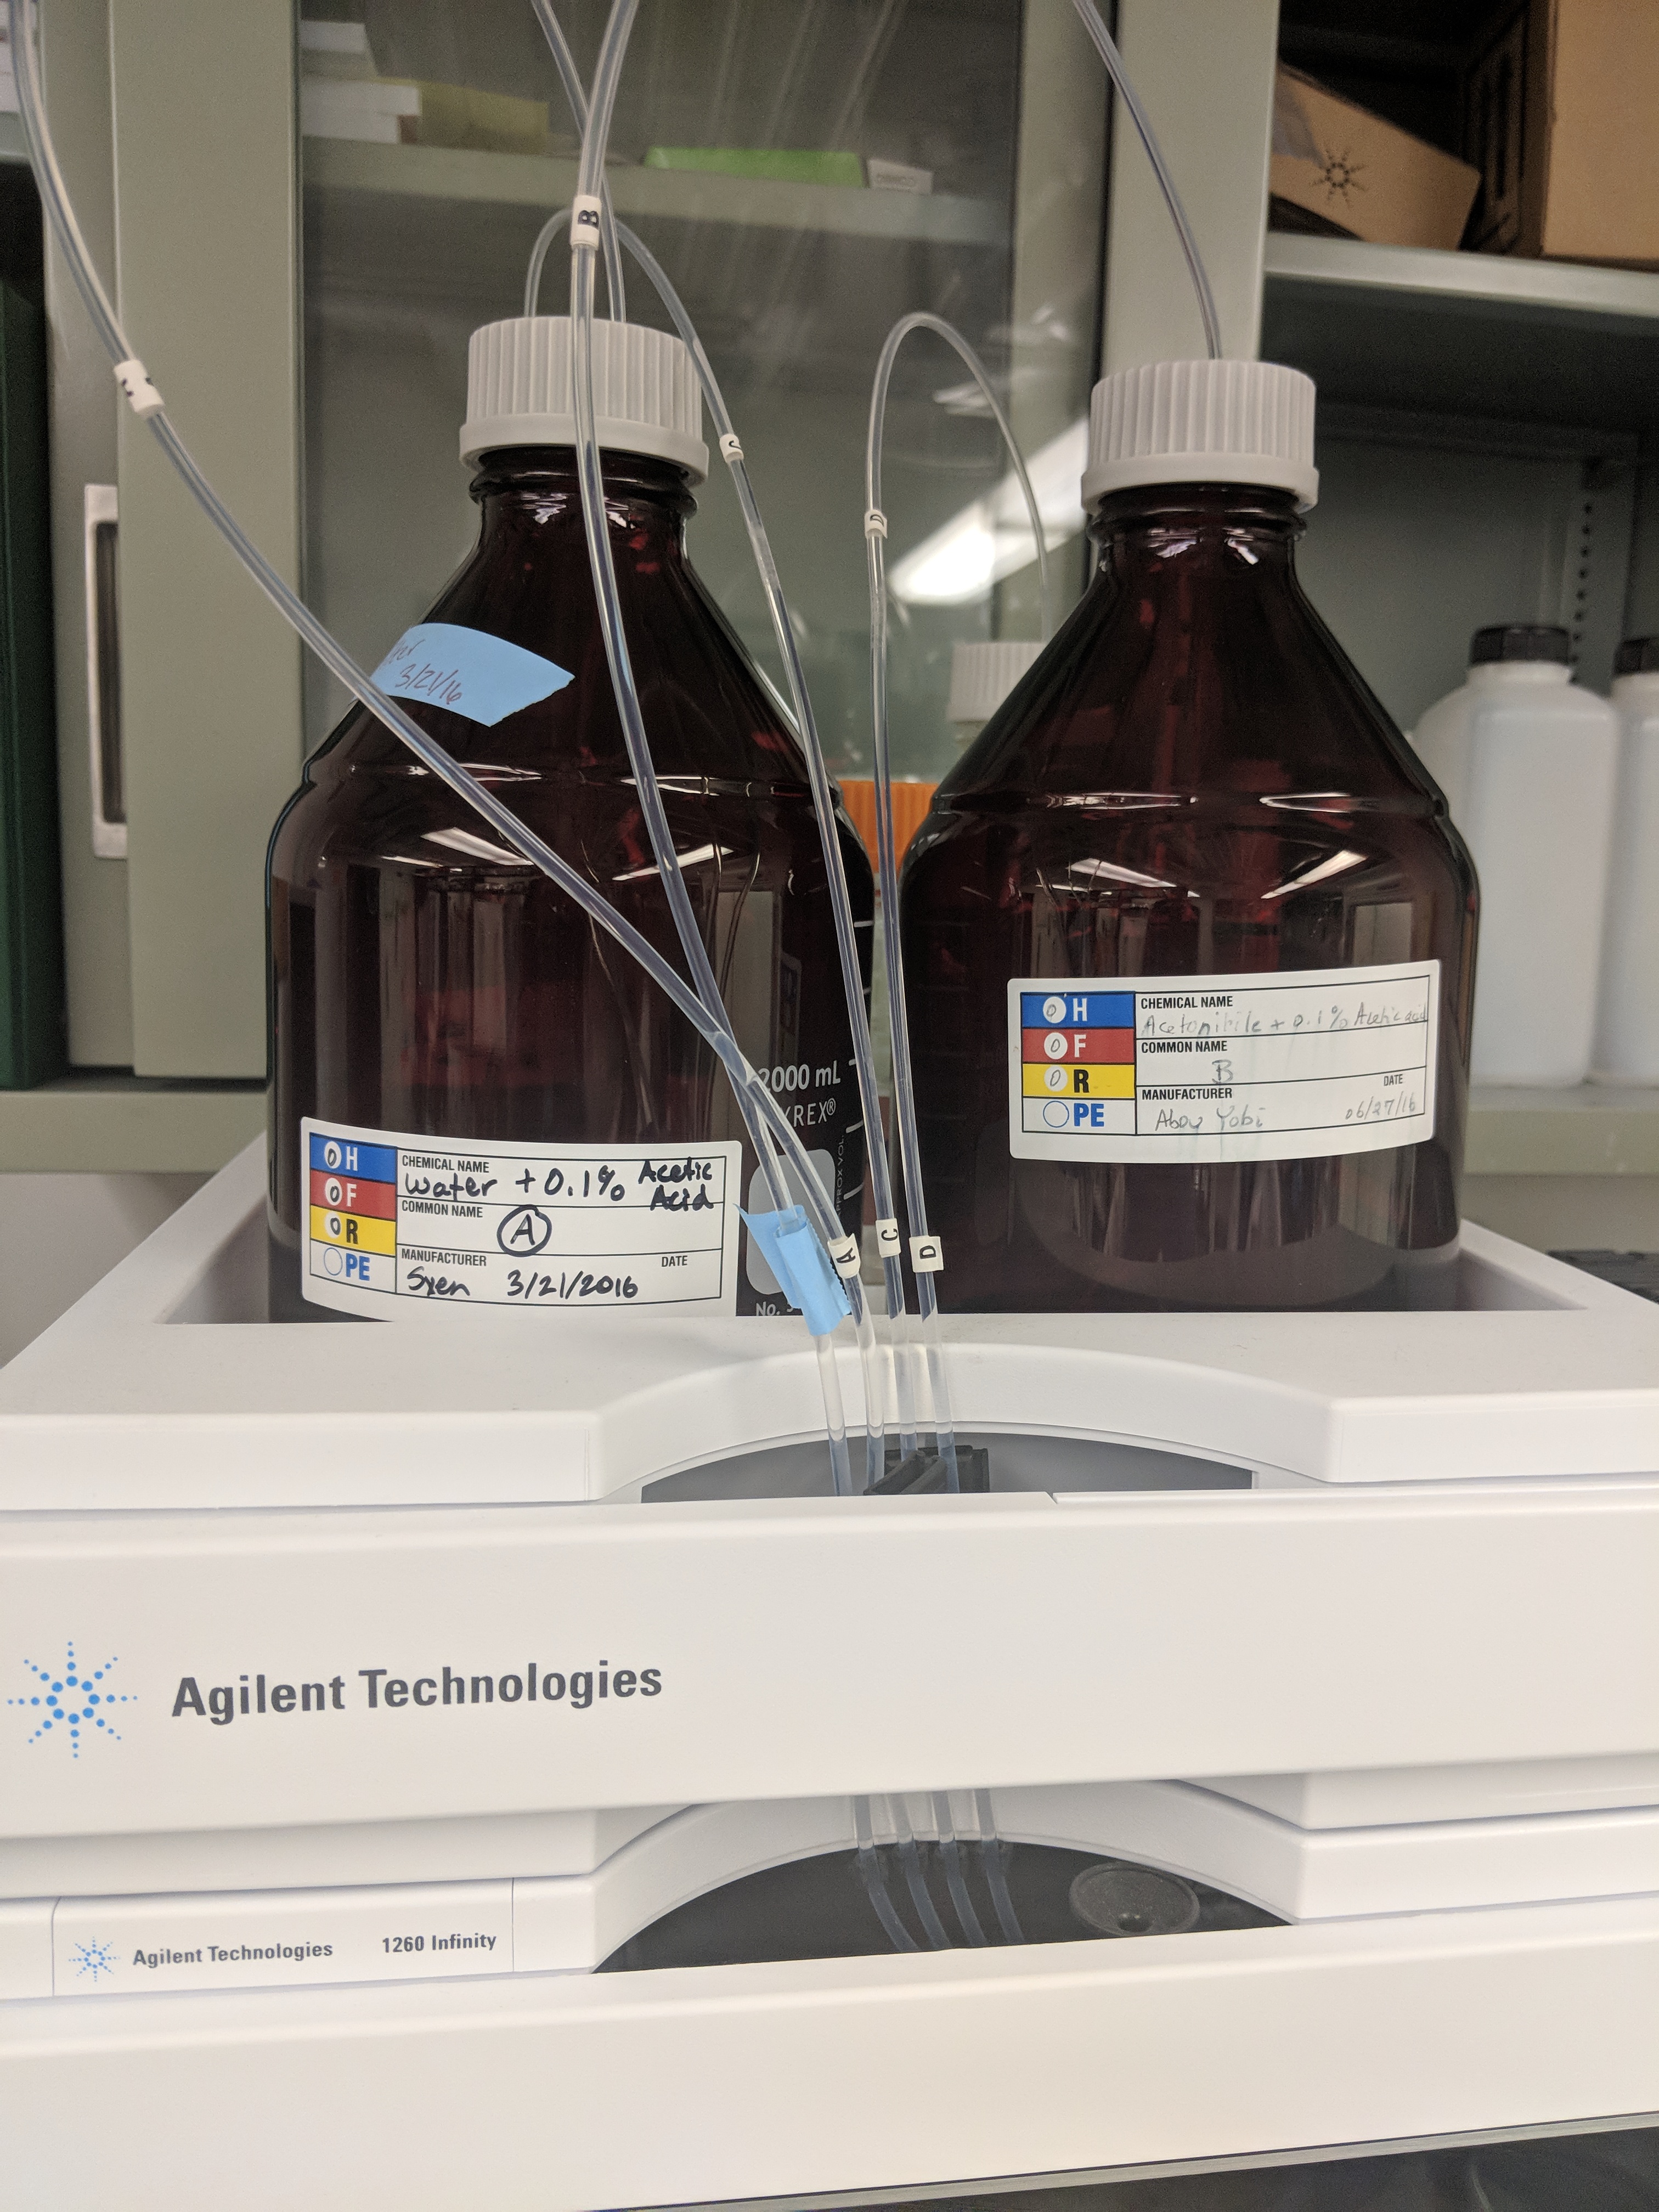 |
 |
 |
 |
**2. Turn on the pump 30min - 1hr before starting.**
- Start with turning on the machine with a lower pressure (0.5)
On - Once the temperature has reach around 60C, then change the pressure back to Method pressure: 1.0 (mL/min)
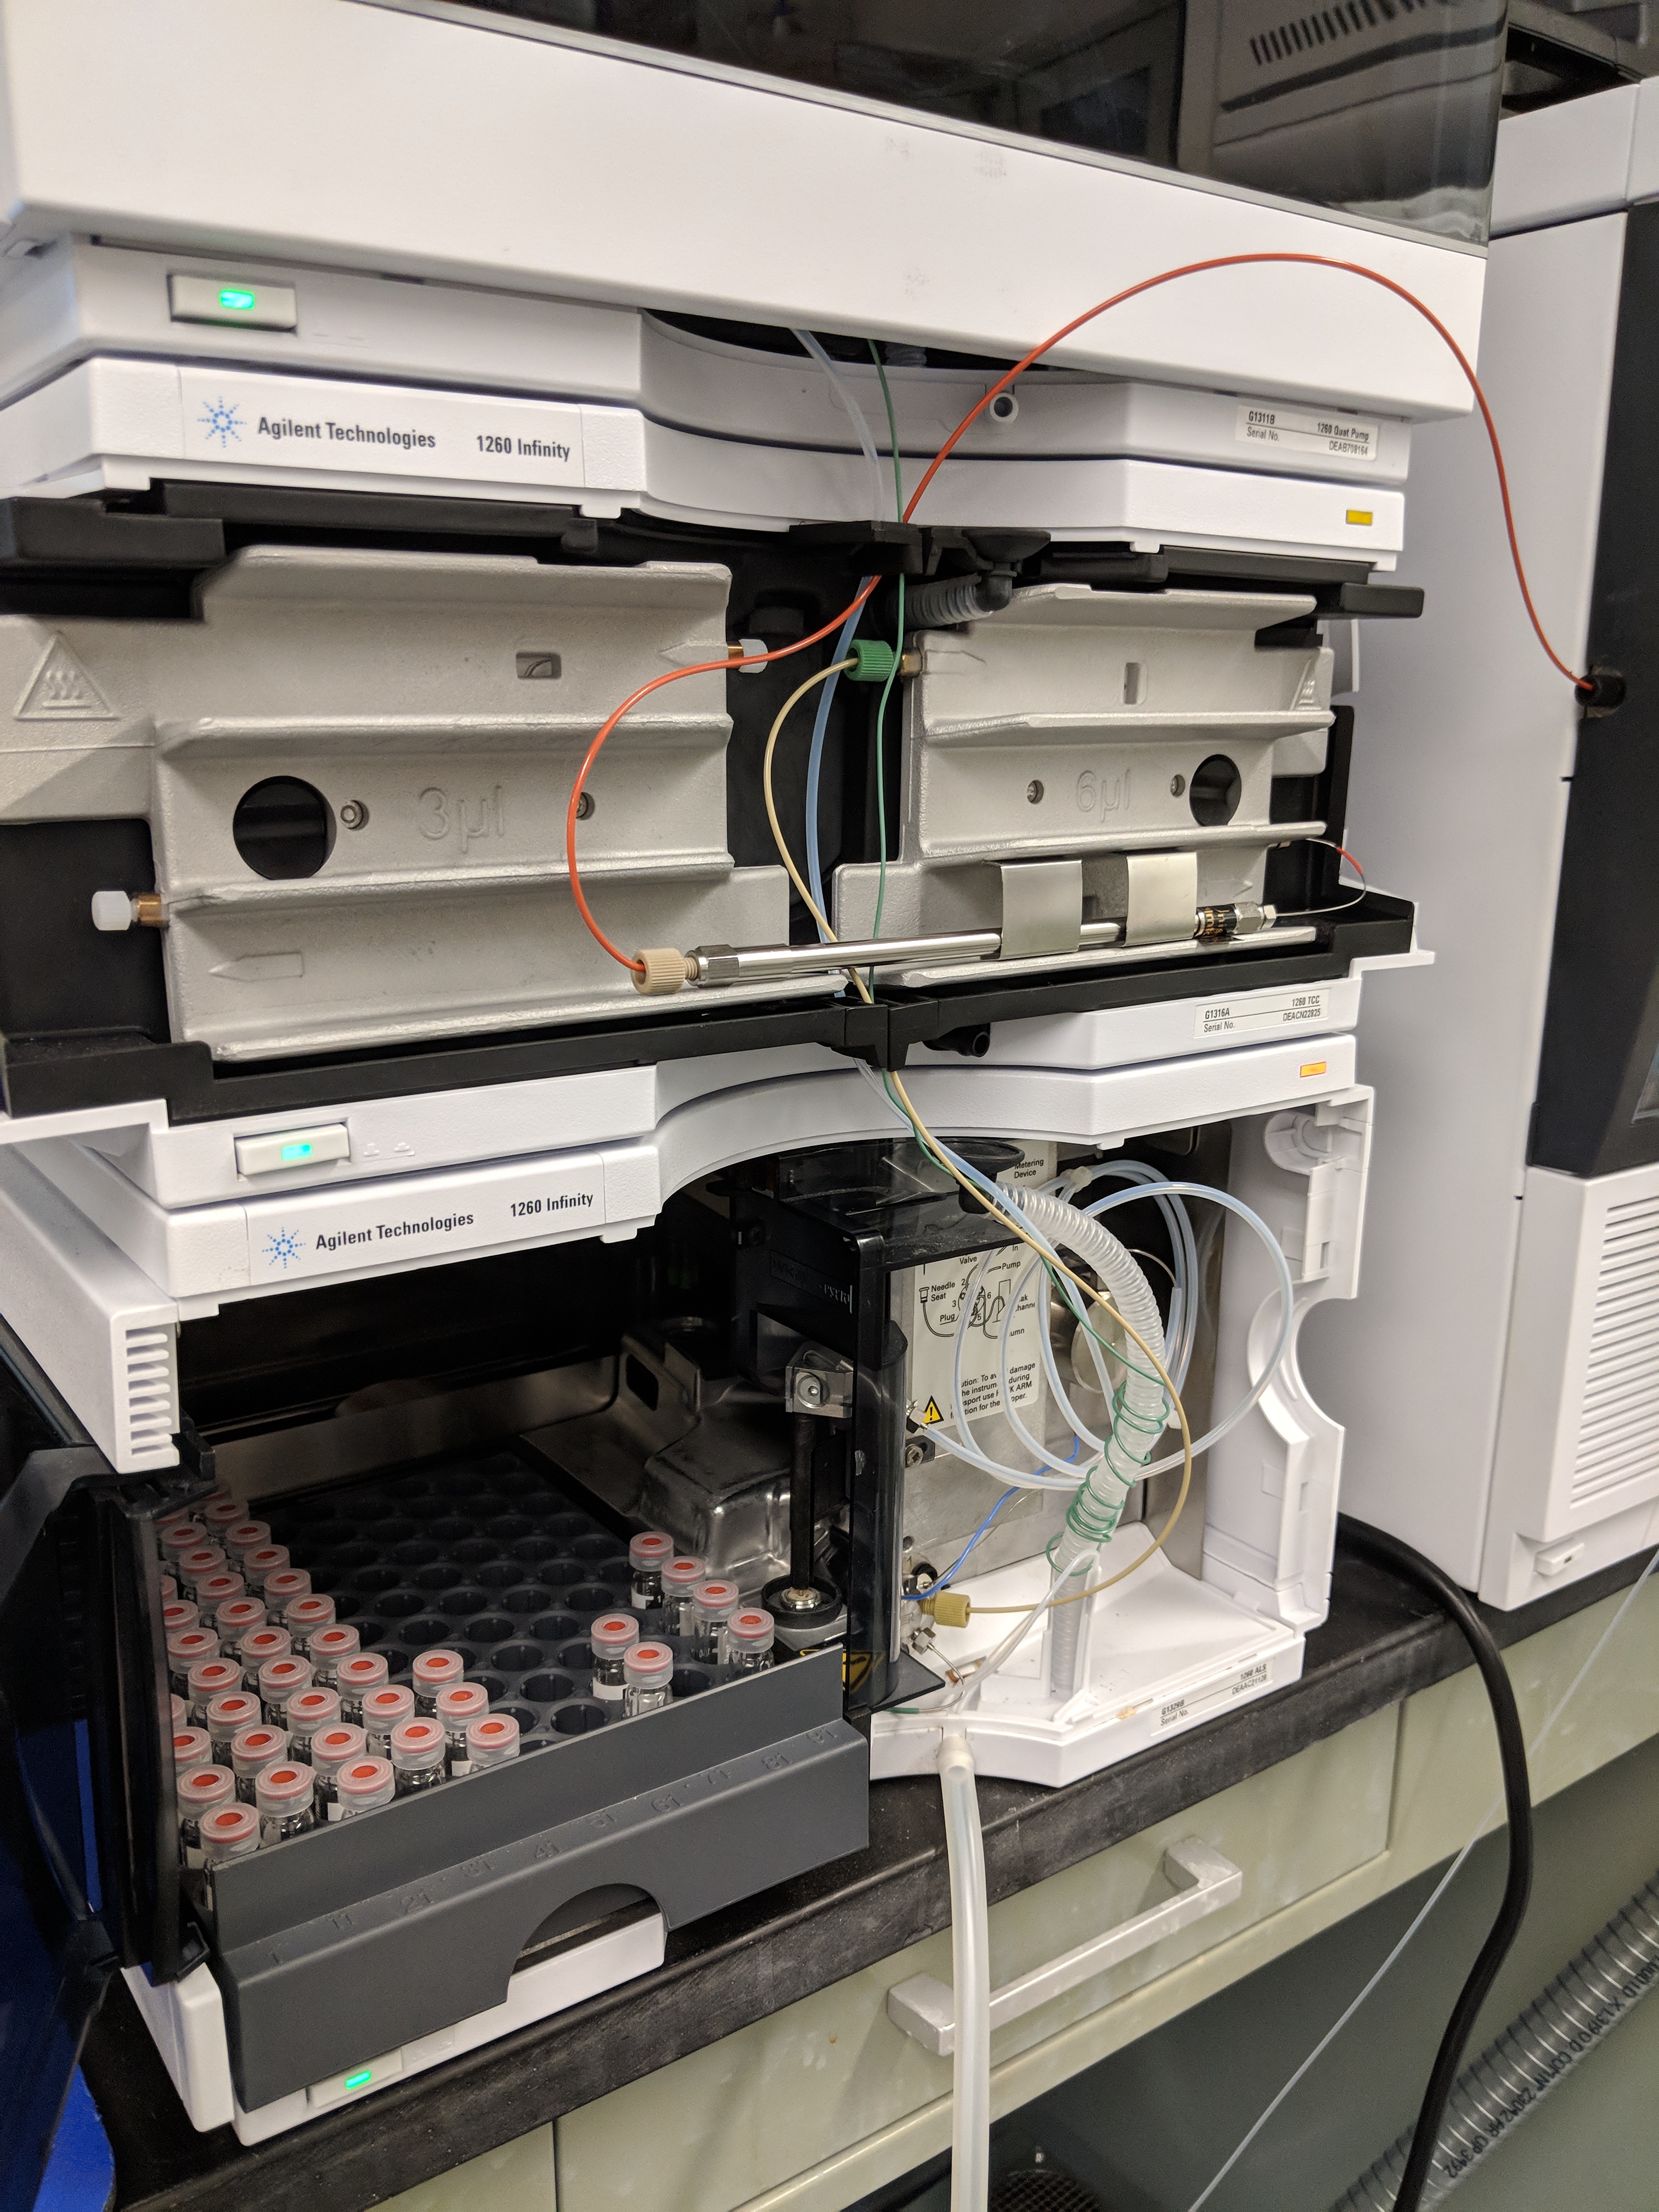
3. G6100 (online)
Sampler references black needle that will go from tube to tube. Idle box green (on)
Quant. Pump represents the A, B, C, D large chemicals. The clear tubes have letter labels. Only ever replace these one at a time, so there is no chance at switching tubes in the wrong liquid. Stanby box (grey offline)
Column Comp: represents the colume, and there are two shown on the screen because you can have 2 seperate columns and adjust the temp. Displays temp. Not ready (yellow)
Watch the pressure to make sure its not
too low (leak)
too high at red bar (400mL/min)
If it gets close to 500 it can handle it, but that might be a sign there is a clog or something thats not too normal. Too much pressure you can develope a leak, or cause issue with other tubes. MS: is the quadrapole shown for the mass spec (6120 Quadrapole MS)
Signal 1 plot is the sample endogenous form, signal 2 is the IS form.
Every time you run the LCMS, make sure the Method File icon has the correct method name
SV_PHENYL150X3MM3UM_ABA_GA_SIM4_SHANTEL.M (sven_columntype_hormones_methodversionnumber_user.M)
the methos scan will look at anything with all masses (so anything will show up, more noise that I dont want).
sim allows us to specify the molecular weight of what we are looking for (i.e., ABA) and then the mass spec will only scan at that MW. So you can do this on all the hormones you want to look at.
- Specify or change a
Run Method(in our case, we exluded GA19)
Methodsave asname the method in the folderc:\chem32\1\methods
Edit Entire MethodLeave all checkedOKdesciption of method you can edit but is not necessaryOKALSOK
We wont change the Solv A and B ratios, Keep the fow rate at 1.000 mL/min.OKOK
Temperature fluctuations can effect peaks, so he keeps a LEFT high temp at 60C. And left and right are combined, so they both are the same.
Set Up MSD Signal :Setting up the masses and the retention times we want the MS to start looking for our specific mass.
general tune file:atunes.tunALWAYS put it on this one, no matter what anyone else tells you. It points to the most recent tune file.
ModeSIMkeep that mode
Polarity, ABA/GA arenegative, if you dont know run one with negative and then again with positive to see where your peaks show best.OKOKIf you need to edit the hormones, this mene is where you edit.
GA19 Group4Selectcutboth lines
Change Group 6 retention times from 5.6 to 5.5 And do the same for the IS GA19 samples
The retention times for the Internal Standard or "endogenous" standards are differeent than when you run the samples.
Sample Purity: looking to M- no adduct (mass) and M-H (M - 1) in the negative tab since we are looking OK OK OK
Specify Report: G6100 Calssic Reporting check Screenuncheck File and the Quantitation setting is set to certian numbers based on the injection amount we did (24 and 48). And now everytime it runs, it should pop up on the screen. OK OK OK OK OK OK
Method Save Method MUST BE DONE now, or it will not run with this new updated method, it will run with the old method. Comment if you would like OK
- Set up Sequence Parameters and Tables (see instructions here).
Press the giant
ONbutton on the screen, when you hear a sound, thats the pump working. MS is still offline, when we actually start a run, the MS is online. and the temperatures are coming up to temperature.Make sure the pump setting is back to 1.000 mL/min
Turn
ONthe MS Eveything should turn green and be ready. Once everything is ready, The top left tab will be greenready- Double check
Sequqence Parameters, andSequence Table,Method, and then re-Save Methodjust in case. - To start the run:
Run ControlRun SequenceNOT RUN METHODa. If you ever need it to stop, you can press
Pause Sequencethen once it has paused after the current sample, THEN you can pressStop Run/Inj...and it will stop at the end of this sample (or the one following) but never in the middle of a sample.
General LCMS Notes
Solvent B will go up in volume during the run, but Solvent A will constantly output the same volume, so solvent A always runs out quicker.
Documents Shantel screenshot_logs
Label the files date_columnname_hormone
HP Computer has no internet, since the software needs to be run on window 7 and not upgraded (and USDA has a policy that all computers with a network must have windows 10)

LCMS data analysis using Agilent OpenLab and R 
**FIX FORMATTING OF PROTOCOL**
Protocol for data analysis of runs conducted in Columbia, Missouri (USDA-ARS in Oliver Lab) using the Agilent LC-MS (single MS). Instructions by Sven Nelson. Steps include calibration using a standards dilution series, peak calling, setting up the dilution factor and other settings for correct output from Agilent software, and downstream processing using R. R code for this analysis was written by Sven.
Required information:
A. Sample mass for each sample (filled tube after lyophilization - empty tube)
B. Initial amount of IS (for each GA and for ABA) added per sample in ng.
C. Final dilution and injection amount to determine dilution factor/multiplier.
Analysis
Online software controls machine
Offline software looks at data
Note: If you close OpenLab CDS offline for some reason and it won’t reopen, giving you some error about the license server being down, specifically lmgrd (error -91, 121) then just restart Windows to solve this. (I tried to solve without restarting for a long time, but restarting was the only thing that worked.)
Step 1: Setup report settings:
Report Specify Report… and Under Report settings:
a. Select: “Use Intelligent Reporting”
b. Set the report template to “Sample_Summary (4 decimal places)” (Sven custom template)
c. Set the calibration template to “Calibration”
d. When viewing reports, you may want to select “Screen,” but for file output select “File”
e. Then Repo8rt file name should be Date SampName and file type should be .XLS Note: Do not select .PDF and .XLS or it will only make a PDF for some reason
f. Select: “Copy report to:” and select a location where you would like reports output. You will access these with R later.
OKonly if quant set does not need to be changed (next step)
Under Quantitation settings: (Only change if IS amount has changed from previous runs, OR first time use)
Calc ISTD, Based on: Area use multipliers etc √, Multiplier: 2.33333, Sample amount 0, use sample data from From Sam...
Compnd & ISTD amount is the final amount of ISTD for each compound, in ng /injection. Multiplier is what that number needs to be multiplied by to reach the starting ng of ISTD per sample (Initial amount ISTD/sample; 7/3; 2.33333). This is easier to calculate because you know what you put in and you don’t need to divide by the volume at any point.
So in the case below, I started with 56 ng per sample (which was 7μl at the end of extraction) and injected 3μl (7/3 = 2.33…) giving an injected amount of 24 ng (Except for GA12-aldehyde, which is double, 48ng). This left enough for 2 total injections, just in case.
OK
Step 2: Setting up calibration settings:
Calibration Calibration Table…There may already be a calibration table from last time, but need a fresh calibration table.
Useful info: Calibration table
For IS samples: Amt stays constant (while changes for endogenous) Ref = No, ISTD = Yes
For endogenous form samples: Amt change (while IS stays constant) Ref = No, ISTD = No
First “#” is an id overall, last “#” should be the same for matching endogenous and IS pairs. Amt is ng (of IS or end) per inj.
5/24/2017 calibrations 7ng:2ng miscalculated 9/21 and 10/27 (not 8ng:2ng) 9/21/2017 calibrations 0.8ng:0.2ng (actual) 10/27/2017 calibrations 0.8ng:0.2ng (actual) GA12-Ald-IS was 1.6ng for 9/21 and 10/27 Useful info: Calibration settings (see image →) For Default Calibration Curve: Type = Linear (we expect a linear correlation) Origin = Force (we expect this goes through 0,0) Weight = Equal (each value has equal weight) Other settings generally weren’t changed. Next , create a new calibration table:
OR
Calibration Recalibrate… replace and adjust the Amt in the table (Recalibrate doesn’t work if RTs have changed, so easier to just make a new calibration table.)
SO
1) Calibration New Calibration Table…
- Automatic Setup = √
- Level 1 (will increase this for each subsequent run)
- Default Amount: 0.8 (This would be the ng amount for IS. Will need to adjust this for end later.)
- Calculate Signals Separately = √
- Overwrite existing calibration table? = YES
2) Data for all peaks will appear (both signals) from the currently selected run. You need to do the following:
- Add compound names in “Compound” column (order is: GA8, GA29, GA1, ABA, GA19, GA20, GA53, GA12, GA12-Aldehyde)
- Correct “Amt” column for endogenous peaks (also GA12-Ald-IS was 1.6 this time)
- Change ISTD column to “Yes” for all IS rows (must do this before adjusting last column)
- Adjust last column “#” so that IS and end pairs have the same number
3) Do this first! Set integration start & stop for all peaks. Make it broad to cover the entire peak
To adjust start and stop for peak integration:
- First go to Calibration > Calibration Table Options… > Identification Details (Normally you are on “Overview”)
- Adjust the From and To for your peaks.
- Also adjust RT values where it appears off.
- Def will become unchecked. Leave it unchecked.
- In my experience, later peaks (GA53, GA12, and GA12-Ald) were automatically given wider integration areas. Possibly because later peaks are more likely to be wider? These can be left unchanged if already wide. (if this causes issues of non-specificity, come back and change the width.)
- Switch back to “Overview” at the end.
Calibration Calibration Table Options… Overview or use the Calib toolbar drop-down
4) Now open the next run from the navigation table (Level = 2).
- Calibration > Add Level…
- Level = 2, Default Amount: 0.8 5) If any peaks aren’t added, it probably means you need to readjust the From and To again.
- I tried adding them using Calibration > Add Peak…, but it didn’t produce the desired results
- Easiest was to adjust the peak From and To, then delete all rows for this new level and add a new level again (with the same number)
- It is possible that if I had just adjusted the From and To first, then done Add Peak (or Insert… and chosen peak) that this would have worked without deleting things. 6) Once all level 2 peaks are present correct the amounts in the amount column.
- No need to add compound name, lvl 2 peak shows up under lvl 1 for the same compound
- Correct the Amt column amounts
- No need to adjust the last “#” column or any other columns 7) Now repeat this for the remaining levels (remaining calibration runs).
- Repeat #4-6 until all standards have been added
- Click OK. 8) Finally, go through each compound (end and IS) and click on the first row to check the curve.
- The curve should appear to the right with an equation above and R2 below (Correlation)
- For endogenous compounds, check that the Correlation is at least 0.99
- For IS you do not have multiple dilutions, but check that the points are generally in the same vertical (y-axis) location.
- If either of these is off, check that you haven’t just input a value wrong in the Amt column.
- If they are still off and you believe it is due to the real peaks, you may need to redo the run with standards (maybe you diluted wrong… maybe you are too close to the detection limit or too high so that you are not in the linear range). 9) When done, click “OK” and correct any errors produced. You are now calibrated!
Go back and Check Quantitation settings under Specify report (ISTD Amounts should be automatically set now, but just check) Save the method. Recalculate > With method… (may want to set integration first) ↳ Select method (I also selected report, but not sure if it matters) ↳ Select “None (no report)” or it will waste time generating reports. ↳ If you order runs by time, it will auto step through all runs in order. Next, Adjust Integration ON/OFF in Integration settings ↳ This is useful for automatic peak integration, but in cases where peaks are very difficult to catch automatically, it it not worth the time of setting this up. Manual integration will not be prevented in “OFF” areas. So just do manual integration by hand if it looks like that is going to be faster than automated integration. ↳ Adjust integration (manual integration) of all peaks for the dilutions series ↳ Calibration > Specify Report Set it back to export to File and xls. Specify location. 4) Manual integration of all sample peaks (if auto integration looks good, leave it be) 5) Export reports (xls deposited in folder set above) ↳ If reports fails to export when you hit print (nothing happens), just restart windows and restart the software, then try again. This generally solves the problem. (probably caused by virtual machine pausing, but unsure why.) 6) Use R to pull out info from reports and do plotting or other analysis as necessary.
General Notes
Renamnig Files (this time only) rename run files with correct sample names (correct user errors).
Edit SAMPLE.XML
value for each sample in a run and delete *.B file at top level under run folder (or move it to a folder called “Trash” at the same level for backup). This method isn’t perfect, but names will change in Agilent software and naming for output file will change. The name of the sample in the output file will remain unchanged (but then you can manually edit it).
LCMS Peak Calling 
Load Method _SIM4A_SHANTEL : this will also include the calibration settings already including while creating this method.
Open Data file that you want to analyze: Left Menu
Double Click on sample file
View the Integration menu.
Delete auto-integration lines.
Manual integrate calls (use zoom when necessary)
Double Click next sample file, a menu will pop up requesting to save changes, click Yes
Repeat manual integration calls
DNA Extraction 
Author: James Tanaka | Notes: SMartinez | 2019.07.14
Harvest Tissue
Step 1: Place two metallic grinding beads in each sample well.
Step 2: At the 2-3 leaf stage of development (approximately 10 days after sowing), cut 2-3 inches of three leaves per sample and place in a deep 96-well plate. OR collect approximately 75mg (3-5in leaf) of fresh tissue into 1.1ml 96 well plates, folding to about ½-3/4in in size.
Either sample one plant per sample, or 3-4 plants per sample, depending on the generation and experimental design of the project.
Step 3: Seal the 96-well plate with either 8-well stripe tops (for long term storage) or a securely taped kim wipe (for quick freeze followed by lyophilization).
Step 4: Freeze at -80 °C overnight at minimum. OR freeze in liquid nitrogen and freeze dry for 24-48 hours. Alternatively, tissue can be harvested and frozen in liquid nitrogen and stored at -80 C until grinding.
Prep
Extracting only two at a time is the most optimal. You arent rushing in between steps.
- Thaw Pronase in fridge.
- Turn on waterbath 65C (Lab oven is already 37C)
It will take longer to reach 65C if you have to add water, but you can shorten the time by adding hot water
- Make CTAB Buffer
You can make Buffer before, use hot plate to dissovle CTAB with stir bar speed 4 heat 4, no more heat 4. (30 min too dissolve).
Once made, put it in hot water bath to heat it to 65C. - Prep plates for grinding (cap securely) while waiting for buffer to mix
Extraction Buffer (125ml):
| Final Concentration: | Location | Amount/Stock Concentration | 1 plate 100mL | 2 plates 150mL | 3 plates 225mL |
|---|---|---|---|---|---|
| ddH2O | by sink | -- | 52.8 mL | 79.2 mL | 118.8 mL |
| 2% CTAB | dry shelf | 2g/CTAB | 2 g | 3 g | 4.5 g |
| 1.4M NaCl | Shelf premade | 28.5ml/5M | 28.5 mL | 42.8 mL | 64.1 mL |
| 20mM EDTA | Shelf premade | 8ml/0.25M | 8 mL | 12 mL | 18 mL |
| 100mM Tris-HCl, pH8 | Shelf premade | 10ml/1M | 10 mL | 15 mL | 22.5 mL |
| bring to volume, and dissolve CTAB | . | . | . | . | . |
| 0.2% 2-mercaptoethanol | Under Fume Hood Rm 418 | 200ul/2- mercaptoethanol | 200 uL | 300 uL | 450 uL |
| 0.2mg/ml Pronase E or Proteinase K | -20C Wheat Quality Shelf Rm 416 |
1ml @ 20mg/ml | 1 mL | 1.5 mL | 2.25 mL |
Grinding DNA
Hard strip caps, securely on. GRIND WITH LID OFF!! Or else it wont matter how secure you put the strips on, they will just come off inside the lid.
Step 0: Reserve time on the Geno Grinder by communicating with James Tanaka about project.
Step 1: Turn on the Geno/Grinder 2010 (switch is back left corner). Allow Geno/Grinder to warm-up for 1min before starting.
Step 2: Adjust the time and rpm settings appropriate for your samples by pushing and turning the knobs.
| Tissue Type | Prep Type | RPM | Time |
|---|---|---|---|
| Leaf | lyoph. | 1400 | 1:00 |
| Leaf | frozen | 1500 | :45 |
| Root | frozen | 1350 | :45 |
| Crown | frozen | 1350 | :45 |
| Stem | frozen | 1350 | :45 |
Going over the recommended RPMs can result in breaking your block, if this happens clean up your mess! These settings were evaluated for VWR 96-deep well blocks.
1:30min to start; typically only need two 1:30 sessions.
Step 3: Unless you are using the freezer blocks, place the orange tray labeled “bottom” flat side down (located in drawer below grinder) in the holding tray.
Step 4: Place blocks in orange tray (you MUST have an even number of blocks to even out the machine while running, if you need a height BALANCE, there are some in Lab 411).
Step 5: If you are running more than two blocks the Geno/Grinder can accommodate 4 96-deep well blocks. Place an orange nesting tray labeled “nesting” on top of the two bottom blocks then place the next two blocks in the nesting tray.
Step 6: Squeeze the button of the twist top lid to bring it down to rest on top of the two blocks. Finish twisting the knob to tighten lid all the way (finger tight only).
Step 7: Press the green button
Step 8: Wait for the Geno/Grinder to come to a complete stop and the light in green button to become solid again (if you do not wait it can cause an error on the next run).
If you need too, will open up cap and loosen. Pull tissue up a little.
Repeat until all samples are thoroughly ground into a powder.
Step 9: When you are finished turn the Geno/Grinder off.
DNA Extraction
Step 0: Grind to powder on Homogenizer (Genogrinder).
Step 1: Add 610ul extraction buffer preheated to 65C, mix well and incubate at 65C for 30 min. Mix samples every 10 mins.
Mix well: add a pcr mat on the tubes, mix by inversion + brief centrifuge until dissolved (no compact tissue). If there is compact tissue at the bottom of the tube, it will be okay, you just wont get as much DNA.
Fume hood, long sleeve, shake, with upside down top to always hold mat down. Always in hood
Flatten mats again during the mix again.
- Label new plates
- Freezer 70% EtOH if making fresh.
- Prep 24:1 Chloroform/Isoamyl alcohol if not already made
Step 2: Remove from waterbath, wipe off excess water and allow samples to cool to room temperature for about 10 mins, thaw RNAse, remove steel grinding balls and add 250-300ul 24:1 Chloroform/Isoamyl alcohol
Dan will even start right away without waiting for it to cool. because it takes forever
Removing balls: pull one strip at a time, being aware of broken strips. Hold strip carefully and use a wide magnet (on the side of the hood) to loosen (wiggly) the balls at the bottom of the tubes, and shimmy them up the tube. Usually you can get 6/8. Then go back for other 2.
Glass beaker, chloroform will met plastic!!!!!
Step 3: Shake vigorously to form an emulsion
Mix in hood! Dark green to frothy greenish white liquid. doesnt take much
Step 4: Centrifuge at top speed for 15 mins (15 min @ 4000rpm or 5 min @ 13000rpm)
Use white plates but tranfering may be difficult, so be careful.
Step 5: If RNA free DNA is desired, add 6ul 5mg/ml RNAse to new tube or plate and proceed, otherwise skip to step 6
Step 6: Carefully transfer the upper phase to a new tube (approx 500ul; 2 sets of 225; Use 8 channel)
Step 7: For RNAse treated samples, give a short centrifuge spin (up to 1000rpm) and allow incubation at 37C for 5 minutes, otherwise proceed to step 8
Step 8: Add 500ul isopropanol and (gently) mix well by inverting 15-25 times (can see DNA form)
Step 9: For RNAse treated samples, proceed directly to step 10. Otherwise, optionally let samples sit in -20C for 5-60 mins
Step 10: Centrifuge at top speed for 30 minutes (30 min @ 4000rpm or 15 min @ 13000rpm)
Step 11: Carefully discard the liquid, making sure pellet does not dislodge
You can just pour it out of the tubes,Kim wipes, you can blot edges and will draw the excess etoh, but ALWAYS watch if pellets is moving.
Step 12: Add 500ul of 70% Ethanol
better if its cold
Step 13: Centrifuge at top speed for 15-30 min (15-30 min @ 4000rpm or 5-15 min @ 13000rpm)
Step 14: Carefully discard liquid, again making sure pellet does not dislodge. Allow samples to air dry so that no ethanol remains. This can be done for 20-60 mins at RT, or 15-30 min at 37C.
Step 15: Resuspend DNA in 50-100ul ddH20 or diluted TE (preferred) and mix on low vortex. Samples can be refrigerated immediately or allowed to dissolve @ 37C for about 30 mins.
PHYSICAL ITEMS
Metal beads (96*4 + 7*8) = 384 + 56 = 439; 2 per tube
PCR Mats
Magnet to remove grinding balls
New tube or plate? Final plate.
balance plate
pippettes and tips
CHEMICAL ITEMS
| Chemical | Amount per well | location | 2 plates |
|---|---|---|---|
| Extraction Buffer | 610 uL | - | 150 mL |
| Chloroform/Isoamyl Alcohol (24:1) | 300 uL | below hood rm 411 | 74 mL |
| RNase (5mg/mL) | 6 uL | -20C Wheat Quality Shelf Rm 416 |
1.5 mL |
| Isoproponal | 500 uL | below left hood rm 418 | 123 mL |
| 70% Ethanol | 500 uL | 95% below hood rm 411 | 123 mL |
| ddH2O or dil TE | 100 uL | near sink ; lab benches | 25 mL |
CLEAN UP
- Discard the chemicals into a properly labeled chemical waste bottle.
- Let tips, plastics, gloves, waste, etc., evaporate in the hood for 24-48 hours before discarding in the trash properly.
- Soak the metal grinding beads, then wash with soap and water, followed by an alcohol rinse. Let dry.
- Turn off water bath and centrifuge.
- Refill tip boxes
RNA Extraction 
SAFETY PROTOCOL:
Hazards:
Phenol: Toxic if swallowed, in contact with skin or if inhaled. Causes severe skin burns and eye damage Suspected of causing genetic defects. May cause damage to organs through prolonged or repeated exposure. Toxic to aquatic life. Do not breathe dust/fume/gas/mist/vapors/spray. Wash thoroughly after handling. Do not eat, drink or smoke when using this product. Use only in a well-ventilated area. Avoid release to the environment. If exposed or concerned: Get medical advice/attention. You must sign this training sheet stating you understand the hazards involving the use of phenol.
Chloroform: Hazardous in case of skin contact (irritant), of eye contact (irritant), of ingestion, of inhalation. Slightly hazardous in case of skin contact (permeator). Has CARCINOGENIC and MUTAGENIC effects. Do not ingest. Do not breathe gas/fumes/ vapor/spray. Wear suitable protective clothing. In case of insufficient ventilation, wear suitable respiratory equipment. If ingested, seek medical advice immediately and show the container or the label. Avoid contact with skin and eyes. Keep away from incompatibles such as metals, alkalis. You must sign this training sheet stating you understand the hazards involving the use of chloroform.
Isoamyl Alcohol: Hazardous in case of skin contact (irritant, permeator), of eye contact (irritant), of ingestion, of inhalation. Keep away from heat and any sources of ignition. You must sign this training sheet stating you understand the hazards involving the use of isoamyl alcohol.
Ethanol: Hazardous in case of skin contact (irritant), of eye contact (irritant), of inhalation. Slightly hazardous in case of skin contact (permeator), of ingestion. Flammable, keep away from heat and any sources of ignition. You must sign this training sheet stating you understand the hazards involving the use of ethanol.
Centrifuge: Before using a centrifuge, read the centrifuge safety brochure and sign that you have read it.
Protection:
- Close-toed shoes are always required when working in the laboratory.
- Lab coat and RNase free gloves are required at all times during the phenol-chloroform RNA extraction procedure.
- Wear protective gloves/protective clothing/eye protection/face protection when handling Phenol.
- When using Isoamyl alcohol & Chloroform: Splash goggles. Lab coat. Vapor respirator. Be sure to use an approved/certified respirator or equivalent. Gloves.
- When handling liquid nitrogen, always wear protective eye-wear and protective gloves.
Waste:
Organic waste (all the waste from steps 1- 10) needs to be dumped in a designated organics waste brown glass bottle and disposed of by the official WSU hazardous waste department.
Phenol and Chloroform waste must be disposed of in accordance with federal, state and local environmental control regulations.
Spill Clean-Up:
Phenol: Exposure to the spilled material may be severely irritating or toxic. Follow personal protective equipment recommendations found in the MSDS. Personal protective equipment needs must be evaluated based on information provided on this sheet and the special circumstances created by the spill including; the material spilled, the quantity of the spill, the area in which the spill occurred, and the expertise of employees in the area responding to the spill. Never exceed any occupational exposure limits. Prevent the spread of any spill to minimize harm to human health and the environment if safe to do so. Wear complete and proper personal protective equipment at a minimum. Dike with suitable absorbent material like granulated clay. Gather and store in a sealed container pending a waste disposal evaluation. Block any potential routes to water systems.
Chloroform: Small Spill: Absorb with an inert material and put the spilled material in an appropriate waste disposal. Large Spill: Absorb with an inert material and put the spilled material in an appropriate waste disposal. Be careful that the product is not present at a concentration level above TLV. Check TLV on the MSDS and with local authorities.
IsoAmyl Alcohol: Small Spill: Dilute with water and mop up, or absorb with an inert dry material and place in an appropriate waste disposal container. Large Spill: Flammable liquid. Keep away from heat. Keep away from sources of ignition. Stop leak if without risk. Absorb with DRY earth, sand or other non-combustible material. Do not touch spilled material. Prevent entry into sewers, basements or confined areas; dike if needed. Eliminate all ignition sources. Be careful that the product is not present at a concentration level above TLV. Check TLV on the MSDS and with local authorities.
Ethanol: Small Spill: Dilute with water and mop up, or absorb with an inert dry material and place in an appropriate waste disposal container. Large Spill: Flammable liquid. Keep away from heat. Keep away from sources of ignition. Stop leak if without risk. Absorb with DRY earth, sand or other non-combustible material. Do not touch spilled material. Prevent entry into sewers, basements or confined areas; dike if needed. Be careful that the product is not present at a concentration level above TLV. Check TLV on the MSDS and with local authorities.
PROCEDURE:
DNA-free RNA Isolation For Wheat Seeds (adapted)
Isolation of Total RNA optimized for wheat seeds in small microfuge tubes. Protocol is based an Arabidopsis adaption heavily modified to optimize from Sven Nelson based off of a paper published by Oñate-Sánchez and Vincent-Carbajosa in 2008. For protocol ease, the procedure used for wheat has been left in, and the original protocol with the Arabidopsis notes and more thorough details are found here.
Follow the blue text comments to help you prep ahead of time and reduce total extraction time.
As with any RNA extraction, use extreme caution of RNase contamination. DEPC-treat any chemicals that you prepare. For chemicals like Tris that you cannot DEPC-treat, use DEPC’d water to prepare it. Prepare an RNase-Free zone on your bench where no one will enter and you will never touch with bare hands (do ONCE day before; No need to repeat unless the area has been obviously contaminated or a long time has passed). You can buy fancy wipes or solutions to wipe this area down, but if you don’t have these, a low percentage bleach solution will work to remove RNases. Some sources suggest using SDS in water will denature RNases, but this is not recommended. SDS will partially denature the RNases and then wiping it will spread these still-partially-active RNases around your bench causing more harm than good. Always wear gloves from a fresh box and use other precautions, but remember also that some of this is overkill and we do it to be extra-safe. If you happen to touch a tube with your bare hand do not assume that this means that the experiment has failed and toss the tube. It is likely that one touch will not destroy your sample. Also, there will be instances where you will have no choice but to use a less-than-RNase-Free zone, such as when using the hood or when storing things in a -20ºC communal freezer.
----Day Before----
a. Pre-cool mortar and pestle in -20C
b. Prepare an RNase-Free zone on your bench.
c. Make extraction buffer.
d. Charge handheld dremel (drill-like tool) if being used.
----Day 1----
Sample preparation (grinding tissue):
Grinding the tissue is the most important step of the RNA extraction. You need to get your tissue completely ground without allowing it to defrost. You do not want to see any tissue start to get soggy. Keep applying liquid nitrogen as you grind to keep tissue frozen, this requires some care as the liquid nitrogen can cause the sample to splatter up out of the tube or mortar. Avoid this.
Step 0:
a. Ethanol down the bench area daily with 70% EtOH.
b. Label four 1.5mL microfuge tubes and one PGL tube for each sample.
c. Spin down PGL tubes.
d. Pre-cool a metal block with holes for tubes (from a broken tube incubator). Place this in a styrofoam box and surround with ice (mainly for stability), then flood with liquid nitrogen to cool the block.
e. Aliquot chrloroform and phenol in 50mL tubes, and LiCl and iso-amyl alcohol into 15mL tubes. Keep in 4C until ready to exctract.
Step 1: Grind a minimum of 20mg dry seed (or 20 embryos per sample) in liquid nitrogen. Put the ground sample into a 1.5mL microfuge tube. For wheat seeds, use method a or method a and b together. Method a will get the samples/tissue into a fine powder, whereas method b will grind the samples more thoroughly with the dremel.
a. Use a pre-cooled mortar and pestle. Fill with liquid nitrogen. Add frozen samples, embryos or whole seeds. Grind as much as possible with a pestle. Scrape the ground tissue out using a policeman and place in an eppendorf tube without allowing it to defrost. As best as possible, reduce the amount material lost in transfer from mortar and pestle to tube. Proceed to step 2 if you will not be grinding with the dremel.
b. Place the open tubes in the block and fill with liquid nitrogen (liqN2) until the bubbling ceases. This indicates that they have cooled sufficiently. While some liquid nitrogen remains in the tube, carefully add your sample to the tube. You may wish to cover the top with a metal spatula to prevent the splattering liqN2 from ejecting your samples. A backflip easy open tubes work well, but don’t seal as tightly for downstream steps. Allow liqN2 to stop bubbling in the tube and when most of the liqN2 has evaporated. Grind again with a plastic conical tipped head coupled to a handheld dremel. Wipe the head with 70% EtOH between samples is sufficient to prevent cross-contamination and RNase-degradation.*Grinding is pretty much instant, no need to hold the grinding head at the bottom for more than a few seconds. Leave no time for the sample to defrost.
Step 2: Immediately add 550µl Extraction Buffer and move to the fume hood to add 550µl chloroform.
Vortex 10 seconds (looks like a milkshake). (Do not allow sample to defrost before adding the buffer.)
i. You may need to stick a pipet tip into the tube to scrape some material off of the edge if you used the optimized grinding method.
ii. For all vortex steps set the vortex speed between 5 and 6.
iii. Extraction buffer: 0.4M LiCl, 0.2M Tris pH8, 25mM EDTA, 1%SDS
Step 3: Move vortexed tube to ice if you have 4 samples or less to extract;
If you will have more than 4 samples for this extraction, keep the samples cooled on the metal block cold. The samples in the liqN2 cooled metal block will freeze instantly. Then repeat steps 1 and 2 again with the remaining samples.
Once all the samples are ground, move 4 samples to ice to un-freeze (takes roughly 20 min).
Once all samples are ground and in Extraction Buffer and chloroform, proceed to step 4. Step 4 through 10 must be done 1-2 tube at a time. You will need to make balances for centrifugation if you do 1 tube at a time, but if you do 2 tubes in parallel, they will balance each other. Once skilled and familiar with the protocol, you can do 2 samples at a time. This is the maximum overlap you should do. If you do 4 tubes at a time, you are likely to see a decrease in yield from the 1st to the 4th tube. Leave the remaining tubes in the metal block (add liqN2 periodically to keep cool).
Every time you start 1-2 samples for step 4, place 1-2 samples on ice for the next round. Samples should return to a liquid milkshake by the time you need to use it.
Take Lunch if 4+ samples are being extracted.
Step 4: Remove the sample that are on ice and vortex briefly to ensure there are no ice chunks present.
Spin the sample 3 min at top speed in a tabletop microcentrifuge (≈13,000 rpm) at RT.
Step 5: (in hood) Transfer aqueous (top) layer to a fresh tube.
Because you will do two subsequent organic:aqueous separations, you can carefully suck the aqueous layer all the way down to the interphase division formed by the cell debris on this step.
Step 6: (in hood) Add 500µl of water-saturated acidic phenol.
Vortex thoroughly after adding phenol.
Add 200µl of chloroform and 8µl of iso-amyl alcohol. Vortex briefly, but thoroughly.
Spin 3 min top speed at RT.
Vortexing after adding phenol is important: if you do not mix thoroughly you will get 3 layers after spinning, if you do you will get 2 layer with a very clear interphase.
It is important not to use pH 6.6 buffered phenol for this, instead use pH 4.5 water-saturated phenol.
Step 7: (in hood) VERY CAREFULLY, remove the aqueous (top) layer and transfer to a new tube. Do this right away, do not let the tube sit. Do not suck all the way down to the interphase.
I usually get about 500µl You want to avoid getting any phenol carry over at this step. But, phenol is very slightly soluble in water, so a small portion of phenol will have gone into the aqueous phase. In order to remove this we need to do one final chloroform extraction.
Step 8: (in hood) Add equal volume (for me, 500µl) of chloroform to the tube and vortex thoroughly.
Again, it is important to vortex thoroughly if you want this step to have any effect. We want to pull the last little bit of phenol out of the aqueous layer. Then… either a. or b. below.
After vortexing, transfer sample with chloroform to a pre-spun PLG tube. Spin down for 3 min top speed at RT.
You can still get great results if you simply spin down the tube at this point (3 min top speed at RT.) (just be more careful in the next step as noted.)
Step 9: (in hood) Transfer supernatant to a fresh tube.
If you have used a PLG tube then you can suck all of the aqueous layer out safely with no worry for organic contamination. If you did not then just be careful when sucking the top layer off, don’t suck down too close to the interphase and don’t let the tube sit before transferring the aqueous layer as phenol can come out into the top layer if it sits too long (although unlikely at this point).
Step 10: (in hood) Now comes the moment of truth: Add ⅓ volume (for me this was ≈167µl) of 8M LiCl to the tube and invert to mix.
Precipitate at -20ºC for 2 hours minimum. You will get best yield by precipitating overnight.
If you get a white precipitant immediately then you have phenol contamination. This means you didn’t vortex thoroughly as instructed. Don’t panic, you can still save your sample, but you will get lower yield. But if you do not see an obvious white precipitant (the white will be obvious, very faint cloudiness or schlieren lines are ok) then you will have phenol-contamination free extractions.
At this point go back to step 4 and repeat steps 4 through 10 until all samples are at -20ºC. Store for a minimum of 2 hour from last sample.
----Day 2----
Step 11: Spin 30 minutes at 4ºC at 13,000 rpm to recover pellet (cool the centrifuge the morning of).
A visible brown pellet is a good sign.
a. At the same time, take 10x DNase buffer and DNase I (if frozen) from the -20ºC and place it on ice. If the RNase-free DNase I doesnt freeze at -20C, than keep it in a stay-cold container (like Stratagene’s StrataCooler Benchtop Coolers) in the freezer until you are ready to take out to use.
Step 12: Discard the supernatant and dissolve the pellet in 26µl RNase/DNase-free water. If pellet is hard to dissolve by flicking the tube (no vortex) then add a 10 minute step at 37ºC to allow it to dissolve more before adding DNase.
If you had a white precipitant in step 11: After the spin you will see the white precipitant at the bottom with the pellet. When removing supernatant suck in some liquid and gently “blow” this at the white precipitant. The phenol will come off in organic bubble droplets fairly easily. Make sure to remove all of these droplets. Unfortunately, you will lose some RNA in this step if you do this, but even if you feel like you have harshly blown everything away and your tube looks like it has no pellet, you will still probably get a fair amount of RNA, maybe in the 40-60ng/µl range. If you are careful, you can still get around 150ng/µl yields consistently this way. After resuspending pellet look for any (very small) organic droplets floating around. If they exist, remove them with a 2µl pippetman. If you are careful, you will still get good quality uncontaminated RNA)
Step 13: For Zymo Research Cat# E1007: Add 6.5µl 10x DNase buffer and 3.25µl RNase-free DNase I to each sample (no thaw needed, can use straight from the -20C). Incubate at 37ºC for 30 minutes.
Important: Adjust quantities of Buffer and DNase to the recommendation for the brand of your DNase based on a 65µl reaction.
This step removes any remaining genomic DNA. With only 1µl of DNase I, I still saw some genomic DNA contamination on occasion.
Step 14: Add 470µl RNase/DNase-free water + 7µl 3M NaAc pH5.2 + 250µl 100% EtOH (fresh bottle, not 95%).
Mix well by inverting. (NO VORTEX) Spin 10 min at 4ºC to precipitate carbohydrates.
Step 15: Transfer supernatant to new and final tube. Add 43µl 3M NaAc pH5.2 + 750µl 100% EtOH.
Mix well by inverting. Leave at -20ºC for at least 1 hour.
Lunch Break!!!
Step 16: Spin down 20 min at 4ºC (13,000rpm). Save pellet. This is your RNA. If you can see a pellet this is a good sign. If not, it does not mean that you have no RNA.
Step 17: Wash with 70% EtOH: Add ≈100µl of 70% EtOH and let it wash over the pellet, then suck it up right away and discard. Do not try to dissolve the pellet in the 70% EtOH.
Step 18: Air-dry open tubes on bench. (For about 10 minutes, until fairly dry, RNA pellet will not turn white or otherwise change.)
Step 19: Resuspend in 20µl of RNase/DNase-free water (ex: Zymo Cat# W1001-10). Nanodrop and enjoy! (It is NOT recommended to use DEPC-treated water at this step.)
Final notes:
- Usual yields are > 1000ng/µl from 20mg of dry seed, ≈1500-2000ng/µl if imbibed.
- To check quality → run semi-denaturing gel electrophoresis of ≈400ng of sample.
- Even better: Run samples on the bioanalyzer and you can get a RIN score.
Original Protocol from:
Oñate-Sánchez, L., and Vicente-Carbajosa, J. (2008). DNA-free RNA isolation protocols for Arabidopsis thaliana, including seeds and siliques. BMC Res Notes 1, 93.
| Location | Material | Stock Conc | Volume Add (mL) | Final Conc | C1V1 = C2V2 |
|---|---|---|---|---|---|
| RNA bench | LiCl | 8M | 2 | 0.4M | 8V1 = 0.4(40) |
| Reagant Shelf | Tris pH8 | 1M | 8 | 0.2M | 1V1 = 0.2(40) |
| Reagant Shelf | EDTA | 250mM | 4 | 25mM | 250V1 = 25(40) |
| Reagant Shelf | SDS | 20% | 2 | 1% | 20V1 - 1(40) |
| RNA bench | water | - | 24 | - | - |
| Total: | 40mL |
| Materials needed: | Stock Location: |
|---|---|
| Extraction buffer: 0.4M LiCl, 0.2M Tris pH8, 25mM EDTA, 1%SDS | RT |
| cloroform (does not need to be treated with DEPC) | Chemical safe cabinet |
| water-saturated acidic phenol (does not need to be treated with DEPC) - pH 4.5 | 4°C |
| 8M LiCl | RT |
| 100% iso-amyl alcohol | Chemical safe cabinet |
| 10x DNase Buffer | -20°C |
| RNase-free DNase | -20°C StrataCooler |
| 3M NaAc pH5.5 | RT |
| 100% EtOH (fresh bottle, not 95%; keep this RNase-free) | RT |
| 70% EtOH | RT |
| RNase/DNase-free water - Zymo Research Cat# W1001-10 | RT |
| Liquid Nitrogen | dewer |
| . | . |
| optional but recommended Phase Lock Gel tubes (heavy) from 5Prime 1.5mL microcentrifuge tubes | . |
| RNase-Free tips (20uL, 200uL, 1000uL) | . |
| Ice, metal tube block, Styrofoam box | . |
| Centrifuge (one at RT, one at 4°C) | . |
| Pipettes (20uL, 200uL, 1000uL) | . |
| optional handheld dremmel* | . |
* There are commercial products available for this, but a household Dremel will work just as well and cost much less. When buying a household dremel, a battery powered model is preferred as the cord can get in the way and contaminate your RNase-free area. In addition to this, I believe the battery powered models tend to be less powerful, the corded models may burn through your tubes. If you have the option of one with a high-low speed switch this will allow you to optimize the speed if you are worried about burning through your tubes.
KASP Assay 
Author: ETaagen and SMartinez | 2019.07.17
DNA 1:10 DILUTIONS
The KASP assay calls for 5-50 ng/ul.
The stock DNA is the original concentration after the DNA extraction. A dil DNA plate is a separate diluted down DNA plate, which is used often as a working DNA plate for experiments. Keep the stock and dil plates noted. It’s important not to freeze/thaw the stock DNA as much as possible.
DNA must be fully, slowly thawed in the fridge (maybe 12-24 hours). Slightly vortexed on low settings to mix the DNA and TE (or water) and briefly centrifuged the liquid down.
A 1:10 dilution plate has 1 part DNA 9 parts water.
| 1:10 dil | Parts | 100 uL | 150 uL |
|---|---|---|---|
| DNA | 1 | 10 uL | 15 uL |
| Water (or TE) | 9 | 90 uL | 135 uL |
Use the 50 uL Rainan multichannel pipette (45 uL x2 per well) to pipette the water into a new 96-well plate.
can use same tips repeatedly as long as it remains sterile use a reservoir to pipette the water into the plate
Use 10 ul Rainen multichannel pipette 10 ul DNA into correct plate
important to use new tips every time
Seal the diluted DNA plates using the thermaseals
make sure to seal very well to avoid fridge evaporation
Put stock DNA back into the freezer
Ice Buckets - Under the Sink in Rm 411 Ice - In room with Autoclave
REAGENT PREPARATION
Day(s) before
Primers are ordered dry. If starting from a new primer order, centrifuge tubes, organize each 3 primer system (AL1, AL2, C) and resuspend each tube to 100 uM stock concentration.
Resuspend primers with molecular grade water.
- For Integrated DNA Technologies primer, multiply the ## nmol by x10 and that is how many uL to add to obtain 100uM stock primer solution.
- For Sigma primers, the volume of water to be added is on the data sheet.
Label new autoclaved 1.5 mL microcentrifuge tubes, top: primer name mix , side: primer name mix, initials, date
If primers are coming directly from LGC Genomics you do not need to do anything. Primers are already mixed and contain both forward primers (AL1 and AL2) and the single reverse primer (Common)
If primers are coming from Sigma (separate) follow the table below after a quick vortex @ levels 6-7:
| Primer | Concentration | Stock Amount to Add |
|---|---|---|
| AL1 | 100µm | 12µl |
| AL2 | 100µm | 12µl |
| Common | 100µm | 30µl |
| ddH2O | - | 46µl |
| Total | - | 100µl |
PACE mix (important to keep main bottle frozen as often as possible)
Aliquot 315 uL into black 1.5 mL microcentrifuge tubes
depending on how many experiments we have planned, 16 - 32 aliquots is good
Keep in freezer on a rack labeled 315 uL PACE unless otherwise labeled
KASP ASSAY PREPARATION
2 hours before
- Reserve 2 hour period with BioTech Resource Center (ask Ellie)
- Defrost DNA (~ 2 hours before you need it, or overnight in the fridge)
- Confirm you have enough PACE mix aliquots and primer mix
30 min before
If pipette receptacle (coffee can) is full, empty it
Plan plate set up and record in lab notebook
What primers will you run on what DNA? At what temps? For how many cycles?
Primers and PACE mix aliquots defrosted (~15 min before you need them)
Materials Needed
1000 uL and 20 uL pipette, and 10 uL multichannel pipette
XXXX pipette tip boxes : one Ranin 10uL pippette box for each DNA plate + an additional Ranin 10uL pippette box master mix
Reservoir for primer+reagent mix
96 or 384 well plate
Plate seal
70% ethanol + Kim wipes (particularly if using more than one primer)
PROTOCOL
For the KASP reactions, you need the following in each well:
| Components | Concentration | Amount per well (96) | Amount per well (384) |
|---|---|---|---|
| DNA | 5-50ng/µl | 5 µl | 2.5 µl |
| PACE mix | 2X | 5 µl | 2.5 µl |
| Primer mix | 72X | 0.14 µl | 0.07 µl |
| Total | - | 10 µl | 5 µl |
Step 1: Create the Master Mix(es) (MM) once primer mix and PACE aliquot are completely defrosted. The MM includes the primer mix and the PACE mix needed for a full plate.
| Num. Samples | No. Reactions | PACE Mix | Primer Mix | Aliquot per 8-well | MM per well |
|---|---|---|---|---|---|
| 96 | 106 | 530 µL | 14.63 µL | 65 µL | 5 µL |
| 384 (1 primer) | 126 | 315*4 µL | 34.8 µL | 142 µL | 2.5 µL |
| 384 (2 primers) | 126 | 315*4 µL | 17. 4µL | 71 µL | 2.5 µL |
| 384 (4 primers) | 126 | 315*4 µL | 8.7 µL | 35.5 µL | 2.5 µL |
How did we calculate those values? Example:
530 uL PACE mix for one 96-well plate (5uL * 106rxn) 315*4 uL PACE mix for one 384-well plate (2.5uL * 126rxn *4quadrants)
Careful to not create unnecessary bubbles
The KASP Master mix is very thick and difficult to pipette so go slow and calculate 1.05x your sample number ex. below (just Master mix and Primer mix)
Step 2: Aliquot MM into an 8-strip wells.
put 65uL into an 8-strip wells then use 8-channel pipette. (96)
put 35.5uL into an 8-strip wells then use 8-channel pipette. (384)
Step 3: Use an 8-channel pipette to transfer MM to the side of each well (2.5uL for 384; 5uL for 96)
Can use the same tips over and over
Step 4: Use an 8-channel pipette to transfer DNA to the bottom of each well (2.5uL for 384; 5uL for 96)
Must use new tips every time
Step 5: Cover plate with plate seal. Be careful to press edges with a pen and seal well.
Step 6: Centrifuge plate(s) on SH program to ~1100 rpm
Step 7: Run plate on the PCR machine. Double check your reservation time to make sure the PCR-run time will be complete before the reservation.
Thermocycler settings:
LGC Genomics KASP Mix; info on webpage
| Step | Temp. (⁰C) | Time | Num. Cycles | Extra |
|---|---|---|---|---|
| 1 | 94 | 15 min | 1 | . |
| 2 | 94 | 20 sec | 10 | drop 0.6⁰C per cycle |
| . | 61-55 | 60 sec | . | . |
| 3 | 94 | 20 sec | 26 | . |
| . | 57 | 60 sec | . | . |
| 4 | 4 | forever | . | . |
XXX PACE Mix
| Step | Temp. (⁰C) | Time | Num. Cycles | Extra |
|---|---|---|---|---|
| 1 | 94 | 15 min | 1 | . |
| 2 | 94 | 20 sec | 10 | drop 0.8⁰C per cycle |
| . | 66-55 | 60 sec | . | . |
| 3 | 94 | 20 sec | 36 | . |
| . | 57 | 60 sec | . | . |
| 4 | 4 | forever | . | . |
This is called KASP protocol in thermocyclers.
Step 8: Store DNA & primers in freezer (or fridge if you are planning to run multiple plates that day). Wash reservoir, clean up lab bench.
Step 9: Wrap in foil once thermocycler run is complete.
You can keep the plates at 4C until you can run the plate on the real-time PCR machine, or until you have run all your reactions for the day.
OPTIONAL Step 10: If the primers did not separate well, you can run a PCR extension to try to get better fluorescence.
Universal Extension
| Step | Temp. (⁰C) | Time | Num. Cycles |
|---|---|---|---|
| 1 | 94 | 20 sec | 5 |
| 2 | 55 | 60 sec | . |
| 3 | 12 | forever | . |
Note from Nuan Wen: I checked your folder in the thermocycler, you've made some optimizations like changed step2 from 55C to 67C and adjusted the cycles numbers to 20 cycles.
Reponse: I dont "remember" why I made the adjustment. Until I remember my reasoning, we will stick with the lab universal extension.
KASP AVii7 Viewer 
AVii7
Can use the 96-well and 384-well block
Instructions to Run:
Step 0: open software, insert plate
Step 1: Template
> Desktop>experiments>sorrellslab> sorrels 384 post read> open
Update Experiment name with plate name
Prress save > sorrells lab > SAM > save
> run (left panel) 'start run' green button click '278880209' is the machine code
The machine will warm the cover, then run for 1 min to detect flourescence
once complete, the alleleic plot will appear
> tap graph for auto detect
to adjust calls, click and drag over dots in the graph and
drop down menu apply call, chose your allele and clock graph to show updated calls. 'allele 1, '
Chose SNP assay 2 in Snp assay drop down menu, and it will show quad 3 and 4 to edit dots
snipping tool, to copy and save graph with date_platename in the SAM folder
save read back in quant studio
Print report button top menu
print preview
save button
> sorrells > sam > date_platename save exit exit
click close next to the save button
if you have another plate, return to step 1. or eject plate and close close plate reader. press green button for standy n viia7
the computer no internet (tower to left of monitor) insert usb
copy and save files on usb.
exit software, and turn off monitor
periodically, delete files on the shared computer to save room.
KASP LightCycler Viewer 
LightCyCler 480II Roche
Can use the 96-well block
Instructions to Run:
Step 0: Turn on back switch (give the machine time to warm up); In the meantime, turn on computer monitor (Win XP OS, no internet, always bring a flashdrive)
When the 1st flashing light turns green, the warm up is complete.
2nd light: ORANGE = empty tray GREEN = plate in tray press <-> to open tray If you changed the block (from 96 to 384), wait until wrmup is complete, then open the software in the next step.
Step 1: Open Software LightCycler 480 SW 1.5. Username: admin Pass: Light11
Step 2: Enter in Parameters in New Experiment
Detection Format:
KASPBlock size:96Reaction Volume:10
Analysis Mode:Melting Curves
Temp Target: ADD 1 MORE STEP
| Temp | type | RampRate | Aquisition |
|---|---|---|---|
| 25 | none | 4.4 | - |
| 26 | Continuous | 0.07 | 2C |
Step 3: Put Plates into the Lightcycler . Double check notch and plate alignment before closing the tray.
Now the Plate ID will show. It reads the barcode on the plate.
Step 4: Start Run and this will prompt you to name the run: name_date_info_marker_extno OK
The run will now begin. It takes only about 5 minutes to run
Step 5: Run Complete will pop up. Click Analysis Endpoint Geno (default) OK. Select wavelength, Ok Calculate
Allele X FAM 465-510
Allele Y HEX 533-580 wavelength
Step 6: Print Screen, paste in paint, save as a .jpg for future viewing of the clusters.
Step 7: Save Data (The report tab will now show up as clickable)
Step 8: Report unselect all of the report options except for Results Endpoint Flo..Scatter
Step 9: generate a pdf file PDF. Save in m folder Save
Step 10: Exit Save: Yes
Example Screenshot:
